Thursday 22 January 2015

Creative Expressions Thursday.

Hi Folks/Blogglies

Thank you all so much for all your kind wishes and lovely messages on yesterdays post as always and miraculously I think you all made the cold go away  as this a.m the car had no ice on it at all , you are all totally magic my friends.... hehe

Today I have a little fella for you to meet hehe, as you all know this month on The Creative Expressions DT we have a bit of an animal/friend theme going on and so today I have little Charlie for you to meet.

I have used my favourite colours of card and colouring technique with distress markers so without further ado ( does anyone know where that saying came from 'Further Ado' I mean who just suddenly said that ? I bet all his or her friends looked at him with an ... ooooo get you type look hey...? ( can you see where my mind diversifies off too hehe)

Here's Our little boy... Meet Charlie.

 I have lots of closer ones as we go through the post but isn't he just adorable. I used my fav Plum card paired with Milk card stock. I used Cornflower blue and coffee Archival inks to stamp my background and my sentiment respectively.
So to start I stamped out the little fella twice and snapped a photo so we can compare at the end.

 I chose my colour of distress pens as I knew I was going to do him a browny sand colour so I chose three browns and I wanted his ribbon Purple so I had a couple of purples and a white I will add a photo of all the colours used as we go along too.

 I took a piece of Milk card and stamped my Paw Lattice background around the edges I wasn't fussed if it over lapped or anything like that as long as it was not twisted in the pattern.
I then added a piece of plum over the top in the centre to create a base for Charlie to sit on.
I also Mounted the whole thing onto some more plum card and them milk again to give a nice frame around the whole thing. I set this aside to colour Charlie next.

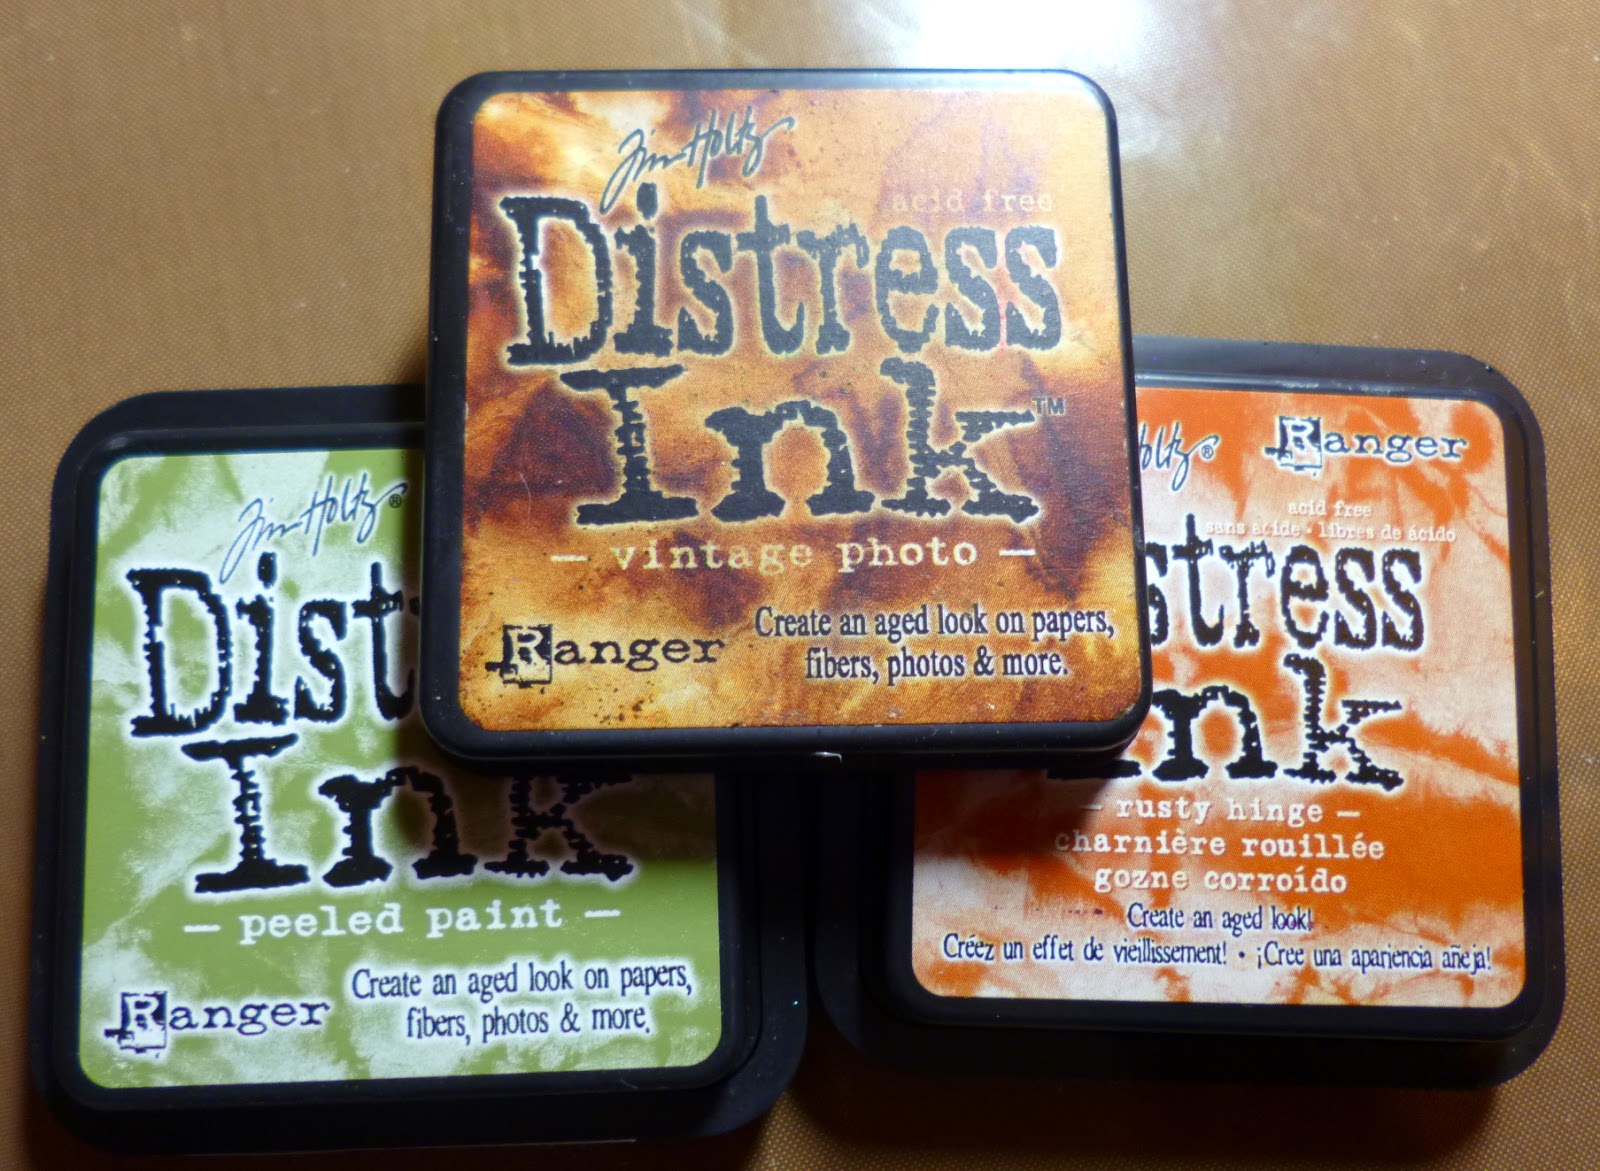
I started with his bow to match him to the backing card so I used Dusty Concord, Seedless preserves and Picket fence to spread some colour from the darker ones to give us a third shade of purple for dimension. Whenever I choose colours I always work in odd numbers like three of 5, the same as flowers etc added to a project it just seems to sit better in odd numbers.

The colours I used for Charlie were.
Antique Linen,Brushed Corduroy and Gathered twigs which is one of my fav brown combo's for hair too.
 

'Charlie'

I started by adding antique linen to all the areas with shade lines and shadowy areas, ie: on the edge of his paws and under and folds in his coat etc. Then I used Brushed Corduroy to add some extra hair strokes on top of the areas just coloured and once dry go back in with the antique linen and colour over the strokes and areas just done, as you all know distress markers are water based so you will need to have good quality card or the paper will disintegrate as you colour over it a few times But foundations card stands up to all my inky Bullying very well. Once I had those two colours done and dry I brought in some of the darkest shade, gathered twigs, I used a few hair strokes on his nose and ears and places like paws and tail and any shadowy folds too.I also used a white pen yes my trusty white pen I couldn't manage without this and my white drawing ink and fine paintbrush too. I use these to highlight eyes and noses and any shine i need on fur/hair etc all the time.

So here is how the two pics looked together for comparison.

Bit different? 

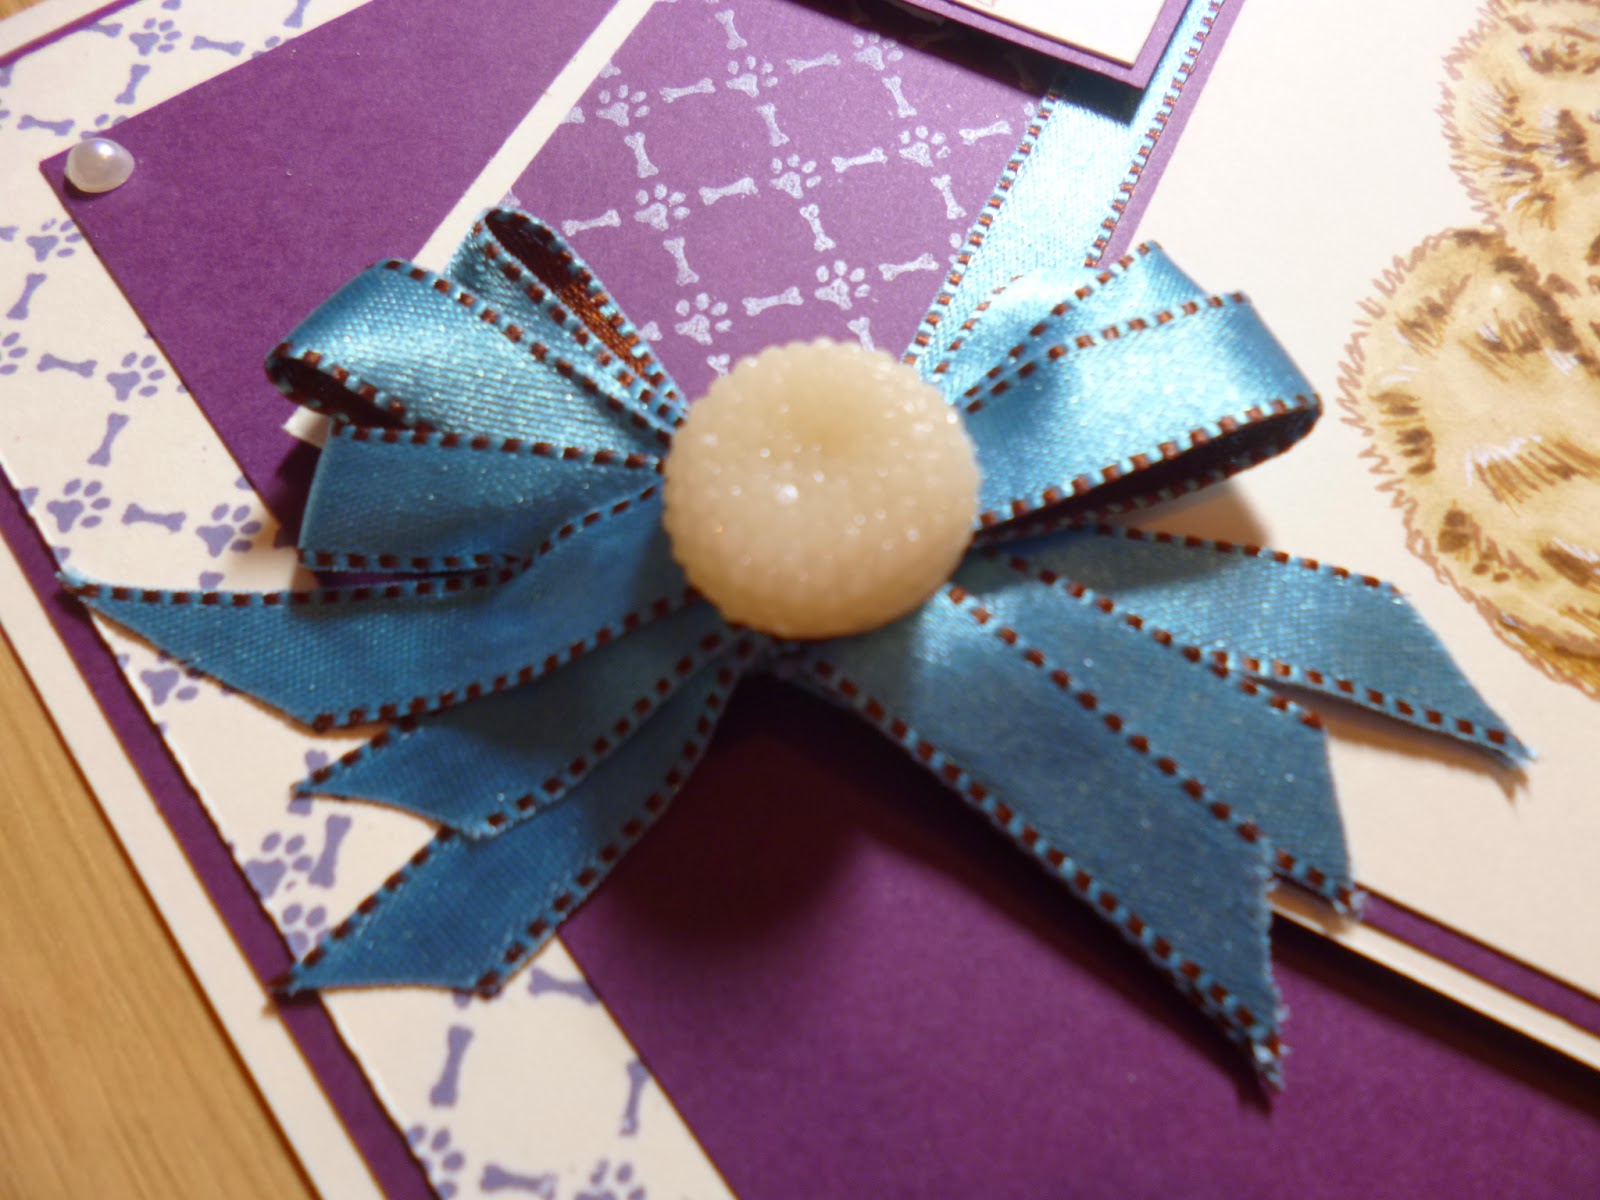
So I cut him out of the card and mounted him onto a larger square of plum card, I used a white ink pad to stamp the paw print lattice again onto the top of that plum card and then mounted the whole thing onto more Milk card. I used my reversible brown and blue Ribbon from Creative Expressions and wrapped one piece around the gap where the two card stocks met.
I raised this piece up on foam and added it on a jaunty angle onto the card base we set aside earlier.
I took a small piece of milk card and stamped with archival ink a sentiment from the Paw prints on your heart sentiment, clear stamp pack. It says.

" Until one has loved an animal, a part of one's soul remains unawakened. Anatole France."

True true....

So I mounted that also onto plum and foam and added that onto the top right of the piece just added to the card.
So I wanted to add a tripple bow with this lovely reversable ribbon so I tied my bow but of course one of the tail sets always ended up Brown so once I had secured it into place with a sticky glue dot I added some double sided tape to the front parts of the brown tails and added some ribbon the right colour up and trimmed it so it looked like the other side. I added a Peach opaque dazzler to the centre of the bow as it seemed to match Charlies coat nicely.
So lastly was just a few extra embellishments as always, you know me I just love embellishments of all kinds.
 I used this little Wendy Vechi resin heart  for the bottom right It had red spots on it so I coloured them in with purple chalk paint and added a little  wax in gold to bring out the carve marks on the resin ( you never have to use embellishments just as they come, doctor them and change them to suit your projects.

 I took this picture of charlie on an angle simply to show with shading in the correct tones and areas you can actually tilt a picture and it will look like it is coming out of the page like the car I did back on the blog ages ago for Visible Image if any of you remember gradients of shading is what pushes an image back or forward the rule to remember is  Dark recedes an item into the back ground, Light highlights and brings it forward. I will do more on this in the coming items on the blog to help you all colour better.


So here is the finished card again with just a few pearls to finish off the corners. I hope you liked it and are getting to grips with my colouring explanations ok.

A nice little card with a few tricks but nice and not too complicated to copy should you want to do something similar. 

I have answered all yesterdays comments left so far so if you left a comment please come on and check for replies as I do try hard to keep up with them all, I know it isn't always possible but I do try every time.
Keep warm everyone and have a wonderful Thursday my Internet family  I am planning to have a review day on the blog where I review a craft item possibly weekly or every other week and so I am looking for thoughts on things like inks, stamps , embossing etc  so we can see what is well made etc. Please let me know if there is anything specific you would like to see. 

Lots of warm hugs 

Love
Kim 
XXXX


Wednesday 21 January 2015

Visible Image Wednesday

Hi All

I am sat here in Pj's a long cardigan  thick whooly socks, a fleecy wrap round my shoulders and a quilt on the bed as I type in it, to say today is freeeezy is such an understatement hey... I bet I have to dig the ice of the car again in the morning just to go to work when it is much warmer in my house, work had no heating today as the boiler broke ( its usually typically NHS and boiling but today.... NOT so much.lol Definitely feeling the winter for sure.)
Still I think of all the people who can't get warm and or can't go out. Poor things. Don't forget if you have elderly neighbours to keep an eye out and see if they need some Food or help and if you don't see them remember to report it.
Now on to today's fun little card I really enjoyed making this one as you know I love to use natural textures on my cards when I can so today I used a gorgeous stamp set that I am sure a lot of youhave already called the sewing room, I have wanted it sooo long.
                         

What do you think?

 I loved making this and I enjoyed how it turned out too, down to the little needle on the yarn to the left haha.
 So to begin , I used perfect medium and clear embossing powder on white card and stamped out several of the smaller images like buttons and stitches and then heat set  I used the ruler stamp down one side too.

 I used these three colours of distress ink to add colour to the paper and make the clear embossing stand out.
Once I had the colours I wanted down on my first couple of layers I added some water and white paint splats I also took a white pen that you pump to prime  and flicked that at the page. I also did a little tone on tone stamping to give a little interest on the background.

 I then prepped a couple of different weaves of Hessian, by pulling out some of the strands on each side to let them fray in to each other.

 I added the light coloured hessian on top of the old then added a small piece of gold ribbon too as you will see below.

 Once this was all done I distressed the edge with my Tim holtz tool and added it to Kraft card, with foam on the bottom to raise it up off the card for dimension. I added several layers of card for matting and layering also.

 I stamped out this saying from the same set of Stamps  The Sewing Room.
Here s the bottom right corner for a peep at the sentiment in situ.

This is some of the cute little pieces added to the lovely stamp set as part of the theme.
I also stamped out the Dress form and added it to the card with a Kraft card layer and I inked the edge of the card with Rusty hinge and Vintage photo.Distress ink.

Here is a closer up of the centre piece and the background and all the co-ordinating pieces.
and here you can see the finishing touches were the peice of string with the plastic needle added and a thimble to the side. The cotton reels, buttons and half reels.

This is the stamp set I used as always with a link to where you can buy of course.


                                           For those of you gals who enjoy  all things Social media ...

You will find all the amazing Visible Image Design Team inspiration over on the BLOG. Come and JOIN the Facebook Group where you can enter our NEW 'Show & Tell Challenge' for your chance to WIN some awesome Visible Image stamps! And don't forget to LIKE the Visible Image FACEBOOK PAGE too!

You can also sign up to the Newsletter HERE

Alright Ladies and gents have a wonderful Wednesday and I will of course see you all tomorrow.                              

Lots of love and crafty Hugs to all.

Kim 
XXXX


Thursday 15 January 2015

Creative Expressions Thursday.

Hello lovelies..

Thank you all for such lovely comments yesterday  I really am very appreciative of all your kind words and I answered them all so far yayyyyy, it felt so good to communicate with you all again haha
I truly feel so blessed to have each and every one of you here with me and your kindness really supports me and touches my heart. It really is such an honour to read and reply to your comments.
I am looking forward to catching up with all your emails too.

On to today's lovely little card, isn't that Kitty a cuttie haha..


So please meet Poppy ...


This is another clean and simple card with lots of matting and layering which keeps your eye straight on poppy in the centre but then your eye will wander to the butterfly  and flower with the tiny pop of colour, I gave her a little shadow too which all helps with the illusion of a bright day. The shadow actually continues all around Miss Poppy which kind of lifts her from the card but you do not notice it at first glance. Don't you just love little visual tricks like that? or is it just me haha..


Here is another view to peak at the gorgeous backing stamp, its in the A6 size and it extends beautifully as you can see, the lining up is sometime hard with rubber stamps but this one is quite easy as you can see where the little paws are on the edge of the rubber if you lean over. I love this background, its called The Paw print Lattice stamp. If you look closely the lattice part is little bones so you can use this for the dog stamps in the range too, clever.


 So I stamped Poppy in archival and heat set her. ( bit anthropomorphic but I feel like the characters do come alive once you have stamped them haha).


I coloured her very subtly with my Distress markers  I used antique linen for her fur. I brought in just hints of colour, which seem much more vibrant in person, but I used a combination of the pink range of distress and the green and my trusty white pen to add some little dots on the flower and the kitties eyes etc, again little things that you do not notice but all help in the realism in adding a little shine or light etc.Lastly I used an alcohol marker to add her shadows to bring her forward on the page.
Once she was coloured I added her to a layer of black card, as this card was in all white and black.

 So next I added my sentiment which I thought about keeping for the doggy stamps in the range with the 'Ruff ' in the words, but then I loved the cuteness of Poppy with the words so thought well its my card so I am gonna add it. haha.

 Then came the tricky part of practising lining up the stamp, as I said you can get it to line up really well as I discovered later by looking to the side of the stamp and seeing on the edge where the paw lines up but at first I just randomly stamped and hoped, so in the spirit of not wasting it, I knew I just needed the outside part as the centre would be covered with matting and layering and Poppy.
Once I got this and knew the centre totally did not matter , I mounted it onto black card again.

 I took my sentiment card and mounted that onto black also and added foam to raise it from the backing card , lining up the edges to keep it even. I just love the simplicity of it.


I added more foam to the back of the main image piece and added that to the card, allowing for the sentiment to sit in the centre of that layer too. and last to finish four little flat backed pearls in the corners of layer two. I am very pleased with her as every time I coloured her before this I used many more shades and gave her a total filled image but I really wanted to try this subtle colouring technique and then the bright flowers. The last thing I did was to use a black pen and give Miss butterfly in pink a black dotty trail as butterflies look so cute with them in my opinion.

What do you think?, do you prefer totally coloured images or do you like the simplicity of the shading method? let me know in the comments, its so interesting to hear all your thoughts and I will be answering them as I did with yesterdays too.

As I type this it is torrential rain here in Hertfordshire and soooooo cold. I really do not like winter at all and will be so glad once spring starts to appear round the corner again, lighter nights and not stepping out of work to street lights and dark nights will be a wonderful thing for sure.

Anyway all I hope you liked today's Creative Expressions stamps and card and I look forward to answering your lovely comments and getting back on the blogging track again.

Love and crafty hugs to you all 

Kim
XXXX

Wednesday 14 January 2015

Visible Image Wednesday

Hi Everyone

Well where did last year go to, I have absolutely no idea and just about everyone is or has been ill , so a new year and a massive happy new year to you all.

I hope you enjoy today's card for Visible Image who continue to grow and spread their awesomeness.
with a gorgeous new launch in time for Valentines day on its way to look forward to and lots of other goodies from them in the pipeline too we are so lucky to be on the team. I will share the new promo pics later in this post but for now here is this weeks card all pretty in baby girl pink. Hope you like it.

 I have used lots of textures and heights in this one and simple but clean and elegant stamping as these stamps from The 10 little fingers & 10 little toes set really do speak for themselves.
Gorgeous and totally charming.

Hers is the side long view to show you more of the different heights and mixes of texture all neatly tucked under and no raw edges showing on this one.


 I started by stamping this main focal point with black archival ink and heat set, I used a winter white card so not so stark and inked the edges very lightly with Spun sugar distress ink , I then mounted it onto black card leaving just a tiny border. 
Next I took another piece of the card and stamped four spun sugar hands in different positions and again inked the edges all in the same ink and mounted that onto black with a small border. ( there is a pattern here haha) .
I took a third piece of card and inked the edges as before and then wrapped a piece of pale organza and loops of pink cotton ribbon around it and also added some pink and white bakers twine around it too and mounted that onto black.


I measured out a little black card for the bottom part of the card and worked out where the stamped pieces would be added then took the feet stamps from the set and inked them with Brilliance ink in Moonlight white which has a little pearly sheen, I heat set and went over the out lines in white gel Sakura pen. once this had dried I added some glue and tipped on this Vintage pink and white with green and purple iridescent sparkles in it (its so pretty, I wish photography picked it up)

This is the ribbons and glitter I used.


So at this stage I had all my components and it was just a case of putting them all together with different heights of foam and using some pale pink card, some off white card and some black, keeping it all very clean and even.


After adding all the different layers I tied a bow with three pieces of the matching bakers twine and added it with a very strong sticky dot. I also added a small silver coloured dummy and a silver nappy pin to dangle from the bow and a small pearl to the centre of the bow.  I also finished off with a few iridescent flat back pearls that shine pink in the light with their aurora borealis coating to match. I also added a small piece of pink crochet lace to the main body of the card under the stamped hands for a little extra pop of colour for a cute little girlie.


And here is the completed card, The feet sparkle so much why oh why can't the lights pick it all up for the camera. oh well it shows also that you can go with black on a baby card as it makes the beautiful pinks pop even more.

Here is the stamp set I used , yup that is right just one set, isn't that amazing for me haha


Now with the inspiration of Valentines day just around the corner again ( my birthday is before Woo Hoo) The very talented combo of Helen and Mark have a new launch of gorgeous and very useful stamps to add to cards for that very special loved one.

Here is a sneaky pic of the new gorgeous stamps in the Express yourself line.


                                            Aren't they just truly scrumptious and special.

The girls on the team as always have been doing amazing jobs with all the wonderful cards and goodies being made, I hope you will pop and have a look at all the gorgeousness on their site too.

I look forward to showing you lots of inspiration with these fabulous stamps upcoming for 2015.


Catch up's

Thank you for all your kind wishes and support , Christmas and new year has certainly been a challenge here in Hertfordshire. I am now back to work full time and working many hours in the NHS.
We also all went down ill all over the festive time and I only had four days off of work for Xmas too. I then also developed a sinus infection and have been on anti biots , yuk yuk.
My mum continues to struggle but is home still and at the moment is still fighting, it continues to become harder with what seems to be day by day as she has good and very bad days.
I couldn't go there over Xmas at all because of being ill and as you all know infections to her are life threatening and land her back in ICU so each time one of us is ill the work raises for the others as they have to spend more time covering.

Apologies and more....

I want to say to all those who won there goodies and haven't got them as yet I am so very sorry I haven't been able to post them as yet, I realise it has been a very long time since you all won them but I want to assure you all, your gifts are sitting here just waiting to be posted.  I in no way would ever have wanted to keep you waiting this long and I feel awful you haven't had them yet I am so very sorry I haven't gotten back to all your emails etc but I truly have not even checked my email as I have so many emails to go through and lots of things to edit. Of course when you are waiting all this seems like bla bla doesn't it and I hope you will all forgive me for this huge delay.

I do want to just say I know some of you have also emailed Sue Wilson from Creative to ask her if she knew about the gifts and I must say to you all this giveaway was entirely my idea and my gifts and my competition although I do have some giveaways donated for you all from them they in no way are responsible for sending out the parcels or for the competition at all so I don t want you to think badly of them or me guys, I have taken some specific days off over the next couple of weeks for the specific purpose of making sure I send out your gifts and to speak to all those waiting personally to apologise for this huge delay. Thank you for your patience and your understanding and I know you will love your gifts and they are I promise you worth the wait.
This year is made for lots of meet ups with you all personally too so I look forward to that immensely.
With love and Kind wishes
as always

Crafty hugs
Love 

Kim
XXXX


Thursday 8 January 2015

Creative Expressions Thursday.


Hello all

And A very happy new year to you my internet family and friends.

I hope you had a wonderful Christmas with lots of family and friends round you all.
I got to see my son and so all three of us were home together which was special for the Christmas week. Unfortunately I had the dreaded lurgy and currently am fighting a sinus infection but it is on its way out thankfully.

Sometime before Christmas we were sent the lovely stamps you see on today's card so meet Alfie
isn't he adorable. If you look at the background it is a lattice work A6 stamp but I have used it in my hand and stamped it randomly with coffee Archival ink. But the cross sections in the lattice are little tiny paw  prints isn't that cute haha. Of course it is called Paw prints lattice stamp so easy to find.

 I wrote this post a while ago now and here I am adding a huge message of good will to all for the upcoming year and getting back on track with the blog posts and getting videos up so thank you for sticking with me and I will let you know my uploading schedule very soon.


Meet Alfie.

I started this one by stamping Alfie onto some Coconut white card with Coffee Archival ink and heat set it so I could use my Inks and Distress pens etc without disturbing the ink.
I also stamped out the lovely quote using the new Clear Creative Expressions Paw prints on your heart verse set of stamps.
 I inked the edges and mounted onto soft gold card to draw your eye into the words.
 I took the Paw print lattice stamp and randomly stamped it onto some coconut white foundations card stock using Vintage photo Distress ink.

 Here is the look so far 

Next I took Peeled Paint and used the same stamp, cleaned between colours so not to muddy the inks.
I stamped again randomly over the first brown layer .

 At the moment it looks a little jumbled but don't worry it all comes together. I inked the edges with Vintage photo to cover the white raw edges and draw your eye to the focus on the card of course.

 Green seam binding on the left side of the card in a small simple one line strip

 I used several brown, grey  red distress markers a grey/blue alcohol marker and a white gel pen for highlights.
Here you see the background piece we made earlier mounted onto white and then soft gold then raised onto foam and mounted on the same card again.
  
 I tied a small bow from the same green seam binding and topped it with an 8mm pearl

 To ground Alfie I have added a small shadow to the foreground in grey/blue, these colours fool the eye and make your image pop out from the page much more than if you left it empty.

I added some foam and popped it at an angle onto the card. I decided not to add any pearls to the corners or extra embellishment as I wanted all your attention to go to the two focal points  on this one.

I hope you enjoyed today's post and I look forward to showing you more from this new pet line.

I am next on your screens at the beginning of February so I hope  you will pop by and have a look at a new line of products for Creative Expressions on the show.

Thank you to all for your continuing patience re the giveaway now Christmas is over I will catch up on all the emails , I have 1050 to get through (ouch) too and lots of extra goodies to get out to all the winners.
Huuuuge thanks to Carol Clarke for my Gorgeous bracelet  she made me for Christmas  what a clever lady you are and I look forward to thanking you in person real soon now the festive period is over.

Thanks also to Karen for popping into where I work to meet me in person and say hi.

And again massive thanks to all you lovely ladies for stopping by and for all your comments as always. I look forward to catching up on all of them and getting back to 'normal' now I am starting to feel human again.
I welcome 2015 as the last one certainly has been a challenge and happy new year again to all my blogglies and friends to the blog.

best wishes


Kim 
XXXX