Showing posts with label Blue. Show all posts

Saturday, 2 February 2013

Sweet Pea Goodness.


http://craftworkcards.blogspot.co.uk/

Hello Everyone.

You may have seen my Christmas cards here on the blog but It's now time for me to take up my role as Design Team new girl for Craftwork cards and share some little cards I made using the Sweet Pea paper packs which are simply stunning and can be purchased over on  http://www.craftworkcards.co.uk/default.aspx 
I absolutely fell in love with the blue tone pad but this one is stunning too. 
If you look in the background you can see some gorgeous paisley embossed cardstock which also happens to be CWC. It came with my Recipe cards, of course you will see some cheeky little Candi in here too.

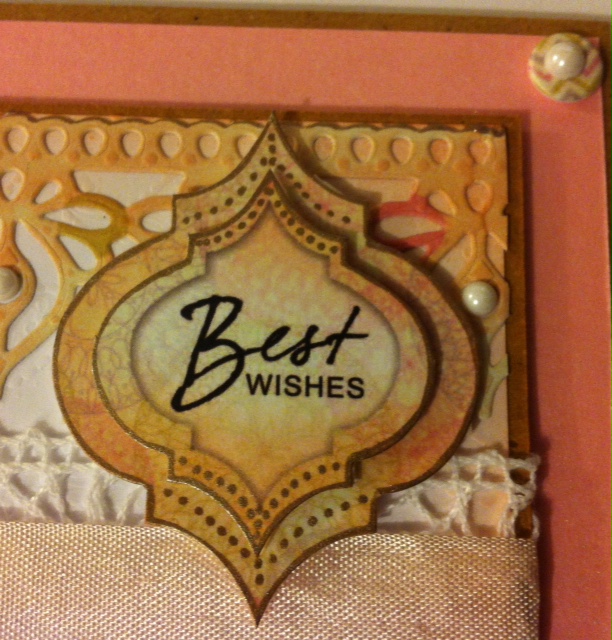
Some close up pictures to show off the layers of Paisley, Candi and Sweet Pea papers.
Why not have a look at the gorgeous Sweet delights goody bag here http://www.craftworkcards.co.uk/products/2784/sweet-delights-goodybag.html
They truly are sweet and yummy without the sins haha..
Here's my sentiment also from the pad ,I added some gold pen in dots, I thought it would look really pretty as if it wasn't pretty enough.
Lastly of course the inside just has to match and here I think you can see the paisley really well.
Now my little Vintage Sweet pea card.  The DT girls had a sneaky peaky on facebook this week. I love this card ,it just flowed so it was clearly meant to be. Do you love it too?
I would welcome your comments below and of course there are lots of gorgeous bargains in the sale section on the website so go have a look and snaggle  (hmm not sure that is a word but you no, I like it so I'm having it.. snaggle snaggle snaggle .. yup just rolls off haha)
http://www.craftworkcards.co.uk/products/by-category/2/105/clearance.html

I had this card on my blog this week and couldn't wait to share it with you all. The colours in the papers are simply stunning and go so well with all the Distress  Ink shades too and as soon as I opened the pad those colours jumped out ready to have Cut and Dry slathered all over the ink and tickling the corners of Miss vintage here to give it a little extra depth.
Here is a little close up of the sentiment from the pad.


And my little butterfly and flower alighting on the seam binding bow.
Lastly of course as always the inside to finish.
Well I hope you enjoyed this my first time out with the lovely team and I want to thank them and Julie and everyone at CWC for having me and also all the lovely visitors to the blog, I hope you managed to get yourself some bargains I know I will be and I look forward to seeing you all for another post on Sunday 10th Feb and as this wasn't my Official day Big hugs to Emma for letting me stand in for her. Thanks also so much to Karen Hayselden who helped me get started today even though she says I sound south haha, Thats so funny. Bless you Karen.  Mwaaa

Crafty Hugs to all

Kim
xxx


Friday, 21 September 2012

Kanban New Card..

Hi All!

Laying in bed at 11.48 pm, so posting today's card from here. I was so exited my new Kanban kit arrived today, yay! So I thought I would dip in with a really feminine little number. I really enjoyed working with it and love the new lighter weight cardstock, but I loved the other card anyway. Kanban use mostly uncoated card so you can carry on and ink over the top and I do that a lot.

I searched my stash and couldn't find a flower that I liked to match this one so I made one using some flat paper flowers and I inked it and spritzed it with Cosmic shimmer sprays, which I love with all that sparkly Mica. Ta da! The flower:

  • I chose my topper and background card to start... Then used weathered wood Distress and inked the edges and corners really well. I have a small flourish polymer stamp and I over-stamped the corners and all around the page.
  • Matting this onto the Kraft cardstock I chose to use this horizontally, not vertically for this one, you can just see the lines in the picture but it feels fab.
  • I added the border across the middle of the card. Then matted and layered some kraft again onto some black card.with a lattice punched peice of paper from Craftwork cards.
  • Then I used some foam pads to raise this mat away from the card a little. Adding my topper of the wonderful Roses, I went round the petals with a sakura stardust pen and made them twinkle a little. I got carried away and added it to every swirl I had over stamped onto the blue cardstock too.
  • I made my bow from three lengths of American seam binding, which is amazing. Using the spritzer spray I added a little to the edges and scrunched it a little. Adding it to the corner I covered the centre with a matching sparkly button with a blue Aurora Borealis coating. I added some bling and a sentiment.
  • I matted and layered a sentiment inside too and made a matching box.
I added the picture of it to Facebook and Dawn Wheeler commented and said it was fantastic and so pretty! Shes so lovely and works of course for Kanban so I'm glad she enjoyed seeing my card.

I don't know if anyone saw QVC tonight but I enjoyed an hour of Craftwork cards with the Lovely Julie Hinkly, I got lots of inspiration. I just love their products, as you see from this blog I use their
crafty goods all the time.

Anyways, happy Friday folks, I'm working a half day tomorrow so I'm looking forward to that.
Kim xx


Wednesday, 29 August 2012

Blue Christmas card

As promised, 2nd post today is a Christmas card with lots of bling...

Beautiful cardstock and topper from my free kit obtained from the Donington park event put on by Hunkydory.

The cardstock is lovely and the foiled snow flakes are very special! You don't often see blue for Christmas, do you? But I thought I'd play up to it and do some tone on tone work, as I like that look.

It's speeding toward us again, isn't it! December is just round the corner so get making!

Vintage Grasses and verses

Morning all!

Today, I thought I'd add one of my cards featured in the Create and Craft magazine, which doesn't seem to be online yet, but I have received my paper copy in the post already so hopefully it will be online soon.

It was a lovely feature and the photography was really nicely done, Thanks to Laura Atri, the lovely lady who asked me the questions and gave me lots of nice compliments and answered all my emails as needed.

I managed to make the embellishment on the card look like wood but it is actually just a piece of card that I inked to within an inch of its life with trusty Tim Holtz inks, and the stamps were Grasses and Verses by woodware with frantage embossing powers. The backing paper is a vintage craftwork cards paper which is gorgeous.

I used a glue stick and got a really gloopy (technical term) mess onto the page. I also sprinkled on lots of different colours and mixed some clear ultra thick into it too... Inked up my stamp ready then I got the heat gun out.... Oooo stand back.

After melting all the utee, I dropped the stamp into it and pressed hard. Left to set just for a few seconds. Don't leave it to go cool though, in case it sets yours stamp into it, especially for the polymer ones. Then get inking again or adding some glossy accents; I used some rock candy from Tim again because it has a really nice sparkle.

Hope you like it... Let me know.

Tuesday, 28 August 2012

Birthday Blues

Hi bloggers!

I thought I'd have a little play with a kit I got while I was at Donnington Park. It's Dawn Bibby's Collection of perfume bottles with handbags and shoes, this is just a little blending and tone on tone stamping, using Tim holtz inks as always... Got to love them.

Simple but effective!