Showing posts with label vintage. Show all posts

Thursday, 2 May 2013

Heartfelt wishes and Vintage Bunting.


Good Evening everyone, well should say goodnight but then that would be rude as I just got here haha, but the fact is its 20 mins to 2a.m and I just now thought to come on and share the news before sleeping...

Of course you all know I got to the Semi's for Heartfelt Creations in America and I would find out ( or you would) around the first of May....

Well I had a wonderful surprise last week from The very Gracious Emma Lou Beechy who is Heartfelt Creative directer congratulating me for becoming, along with lots of other gorgeous and talented ladies one of the newest designers and I am so so so so very pleased I cannot begin to tell you how lucky I feel right now.

Well after a huge hiccough with FED-EX leaving my DT package with a neighbour on Monday and not informing me at all (tut) I received it tonight and OMG ( I never thought I would say that ) but Oh My Goodness... I felt like the luckiest soul alive , how incredibly generous and amazing are the products, The paper is the most yummiest strokable stock ever.

The stamps are detailed and precut on foam and the dies Match and are just stunning. I cannot tell you how I have been laying here simply wanting to get started on my first project but... Tomorrow is work all day and then I have to play taxi to take my girl volunteering all evening and then work all day Friday which just leaves Friday night in readiness for Saturday's first post and I am so looking forward to it. I also received This months new releases which can be shown with every ones first items from Saturday so I will do some links and items then for you all.

I am also finishing off a little something I am making for the lovely girls at Stamps addicts in the hope of designing for them as I did some bits for them a while ago. So wish me luck.
I may have some Magazine news coming up too but can't share that just yet but I will as soon as.

I'd like to say welcome to all my new followers to the blog, welcome and crafty hugs. If there is anything anyone would like to see or any techniques wanting to learn come an let me know and I will put a tutorial on here for you...

I was thinking of dedicating a day a week to teach a particular item.. like Tutorial Tuesday or wanna see Wednesday or something... is that Corny...? what do you think? Sound good?

Right well I can appreciate that was a lot without any pics so I thought I would add my pics of The Vintage Bunting I made for Craftwork cards recently  which I absolutely loved doing for them, If your a fan of their gorgeousness you will be excited to see some website changes next week and some beautiful new goodies that I for one cannot wait to play with.

Hope you like. Leave me a comment and I will definitely answer and appreciate every single one.


And here's some close up's. It says CREATE ART


And then I decided on a little inspiration.
                                                                                                          
 OK lovelies I will apologise for the wonky pics but at least you get to see the Yummy Vintagey ness
hmmm. It was all made using a fabulous Vintage shabby chiq pad which contained the beautiful colours in the paper I used here with a various amount of techniques thrown in, Stamping, 2nd generation stamping, Kiss stamping, embossing , Non heated and heated. I used Lord Tim's distress throughout of course and lots of Yummy Craftwork cards stamps which are all on their website so why not pop in and have a look and also Congrats to all the lovely ladies who made it like me to the Wonderful Heartfelt Design team too. 

Lots of crafty hugs 

Kimmy 
xxxx


Saturday, 2 February 2013

Sweet Pea Goodness.


http://craftworkcards.blogspot.co.uk/

Hello Everyone.

You may have seen my Christmas cards here on the blog but It's now time for me to take up my role as Design Team new girl for Craftwork cards and share some little cards I made using the Sweet Pea paper packs which are simply stunning and can be purchased over on  http://www.craftworkcards.co.uk/default.aspx 
I absolutely fell in love with the blue tone pad but this one is stunning too. 
If you look in the background you can see some gorgeous paisley embossed cardstock which also happens to be CWC. It came with my Recipe cards, of course you will see some cheeky little Candi in here too.

Some close up pictures to show off the layers of Paisley, Candi and Sweet Pea papers.
Why not have a look at the gorgeous Sweet delights goody bag here http://www.craftworkcards.co.uk/products/2784/sweet-delights-goodybag.html
They truly are sweet and yummy without the sins haha..
Here's my sentiment also from the pad ,I added some gold pen in dots, I thought it would look really pretty as if it wasn't pretty enough.
Lastly of course the inside just has to match and here I think you can see the paisley really well.
Now my little Vintage Sweet pea card.  The DT girls had a sneaky peaky on facebook this week. I love this card ,it just flowed so it was clearly meant to be. Do you love it too?
I would welcome your comments below and of course there are lots of gorgeous bargains in the sale section on the website so go have a look and snaggle  (hmm not sure that is a word but you no, I like it so I'm having it.. snaggle snaggle snaggle .. yup just rolls off haha)
http://www.craftworkcards.co.uk/products/by-category/2/105/clearance.html

I had this card on my blog this week and couldn't wait to share it with you all. The colours in the papers are simply stunning and go so well with all the Distress  Ink shades too and as soon as I opened the pad those colours jumped out ready to have Cut and Dry slathered all over the ink and tickling the corners of Miss vintage here to give it a little extra depth.
Here is a little close up of the sentiment from the pad.


And my little butterfly and flower alighting on the seam binding bow.
Lastly of course as always the inside to finish.
Well I hope you enjoyed this my first time out with the lovely team and I want to thank them and Julie and everyone at CWC for having me and also all the lovely visitors to the blog, I hope you managed to get yourself some bargains I know I will be and I look forward to seeing you all for another post on Sunday 10th Feb and as this wasn't my Official day Big hugs to Emma for letting me stand in for her. Thanks also so much to Karen Hayselden who helped me get started today even though she says I sound south haha, Thats so funny. Bless you Karen.  Mwaaa

Crafty Hugs to all

Kim
xxx


Thursday, 18 October 2012

Kanban prettiness..

Good Evening All.
Hope you all had a good day. I had a nice dinner out today with my daughter, very nice.
I made a lovely little number which I hope you all like after getting home.
  • I took an 8x8 card and covered it with a tiny border with one of the gorgeous papers from Kanban's vintage pad. Then I embossed another tonal piece with an m-bossibilities A4 embossing folder from spellbinders. I mounted it on foam and wrapped my ribbon around it.

  • I love the colours in this Kanban topper so next I mounted the outside frame of the topper on foam and the middle part I put on sightly higher foam, tucking in a swirl just under the edge before moving on to the flower which was cut out of the left over paper which I embossed earlier.
  • So I cut out some swirls and a flower an rolled it up , inked the petals in two colours.Added some tiny pearls an some sakura stardust pen to the swirls and edges of leaves/petals.I also rolled up a thin piece of the paper and squeezed it leaf shape and added it to the flower configuration.

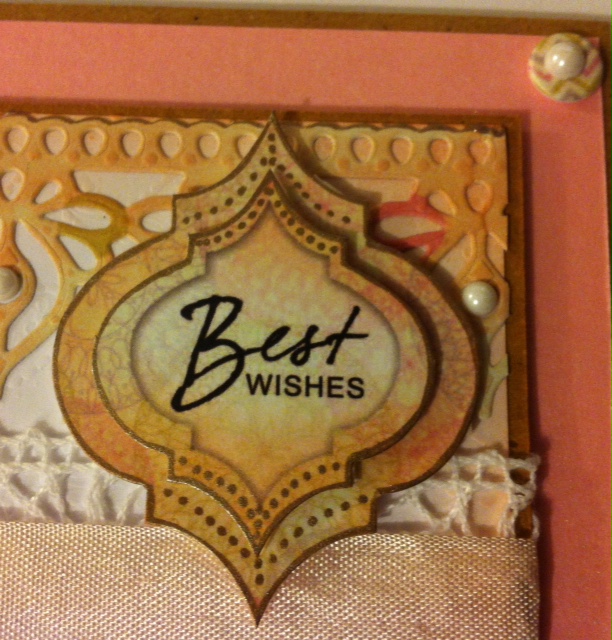
  • After inking the edges of this beautiful sentiment I added it to the ribbon at the lower right of the card.
  •  I tied a smart bow out of this very wide ribbon and added a die cut leafy branch and a studio 490 resin flower which i inked slightly just to tone in with the theme of my card. You can also see in this picture that I inked the edge of the embossing under the bow which brings it all together and enhances the embossing nicely too.
  • I cut out 2 very tiny little butterflies and added them to balance the right hand side of the topper with tiny pearls down the body to finish off.
Well I hope you like Wednesday's card and think it is very pretty as I really do love showing you my creations and appreciate any comments and views.
Have a good night and take care.
Best wishes
Kim xx


Wednesday, 5 September 2012

Pink Roses

Hi all.
Hope everyone is having a good start to their week. Wednesday has just started with it being 12.53a.m here. Before I go off to sleep I thought I would add a little card here for you all to view. I really would be very happy to read your comments if anyone would like to do so. I also will be sending out a card to the first person who does leave a little comment as previously mentioned, that person will also get a shout out on my blog and other social media sites.

Now to the pretty card, as you can see it was a quick creation though very pretty.

  • I started with a Kraft card base 8x8, stamped a sentiment inside and my logo on the back.
  • I took my pink vintage paper and inked edges and corners with Tim's Tattered Rose and a little Victorian Velvet. I do this for two reasons, the first to blend the edges to give it a much softer look so the focus changes as you view the card. Secondly, this way you don't have stark white edges therefore a more professional finish. I added a ribbon and a sentiment wrap from craftwork cards and attached the whole thing to the card base.
  • I took a core candi mat form Kanban and instead of ripping the edges to expose the coloured core in the card, I put some thick foam on to the back right against the edge and added some glue around its edges.
  • I then folded back the scored pieces as I said instead of ripping them off, this makes a little platform raised up for a topper or flowers or anything really, In this case though I'm using a Kanban rose topper, which is stunning and speaks for itself, needing hardly any embellishment.
  • I added the topper and a bow and also two coloured pins in the top of the topper but pushed into the foam under the platform. I was happy with its simplicity, it's an elegant card.

Have a great Wednesday guys and come back tonight for a new post featuring a dartboard, a number and a bottle of champagne. It was a fun and different commission with lots of elements.
Kim x

Wednesday, 29 August 2012

Vintage Grasses and verses

Morning all!

Today, I thought I'd add one of my cards featured in the Create and Craft magazine, which doesn't seem to be online yet, but I have received my paper copy in the post already so hopefully it will be online soon.

It was a lovely feature and the photography was really nicely done, Thanks to Laura Atri, the lovely lady who asked me the questions and gave me lots of nice compliments and answered all my emails as needed.

I managed to make the embellishment on the card look like wood but it is actually just a piece of card that I inked to within an inch of its life with trusty Tim Holtz inks, and the stamps were Grasses and Verses by woodware with frantage embossing powers. The backing paper is a vintage craftwork cards paper which is gorgeous.

I used a glue stick and got a really gloopy (technical term) mess onto the page. I also sprinkled on lots of different colours and mixed some clear ultra thick into it too... Inked up my stamp ready then I got the heat gun out.... Oooo stand back.

After melting all the utee, I dropped the stamp into it and pressed hard. Left to set just for a few seconds. Don't leave it to go cool though, in case it sets yours stamp into it, especially for the polymer ones. Then get inking again or adding some glossy accents; I used some rock candy from Tim again because it has a really nice sparkle.

Hope you like it... Let me know.

Monday, 27 August 2012

Botanical card..

Not a great image, but you can see how this simple little card utilises the paper flowers and not a die cutting machine in sight...

However, I cannot wait for the new machine from Crafter's companion, which I saw demonstrated at Donnington Park last week... All I can say is Wow, and I want it.

My point is, there are always ways around things so if you don't have a die cutter and you want to make flowers rather than pay a fortune for packs of 4 then make your own... You can!