Sunday 29 September 2013

Visible Image Sunday.

Hi Folks


Time of the week for me to add the card I made for my post for Visible Image for my Sunday weekly post. I am having a lovely time creating with these gorgeous deep etched stamps. I hope you get a chance to get some and try them out for yourself.
I am hoping you are all going to Birmingham NEC to the big craft show coming up in November and if you are come to the stand and have a good old look at the stamps and see how wonderful quality they are.
Anyway without further ado.. Here is my creation today.

I used the wonderful new sentiment stamp , it is so lovely and right up my street.
  • Firstly I took an A5 piece of white cardstock and  Vintage photo distress Ink and randomly stamped the crackled Background all over the page just randomly, I didn't have the stamp on an acrylic block at all, I just inked and dabbed all over til the page was covered. 
  • Then I took Rusty hinge,Wild honey and Peeled paint and randomly added it to the page. 
  • I used the Bronte border with Black Versafine ink and again added this randomly across the page.
  • I took the Imagine Dream,Inspire stamp with Perfect Medium and added it in three places on my background but you must make sure all your Distress is completely dry and heat set or the embossing powder will stick to the other ink. I also stamped The small Dragon fly randomly with Brown Versafine in just three places on the background.
  • I used white to Emboss the Imagine set. I then tore the edges all around and roughed up the edges on my Distrezz it all tool and then inked all the edges to make them nice and dark. I rubbed perfect medium on the edges and poured over gold embossing powder and heat set.
  • I stamped out the  beautiful inspiring main focal stamp 'Create with your soul' with Brown and black versafine inks mixed on the block. And tore all the edges again and distressed , inked and embossed them in gold. I wrapped a piece of black crochet ribbon to the edges of the  I added foam to the back and added it to the main card.
  • I stamped out the small dragonfly stamp. twice and using a quickie glue pen I dotted the glue all over the wings and added white Glitter snow, its a lovely fine glitter that sparkles as it catches the light.I added him to the one
  • Lastly I added my little black stones to opposite corners and the bling down the body of Mr D,fly.
    These are all the fabby stamps I used on this card.


On another note Please do not forget to pop over to HeartfeltCreations and vote for me
 to stay in if you haven't already. I really do like to be on the team and Need your votes
to remain so this will need to be done as soon as possible now please, just click on the link and you can vote for me and also the new team could do with your vote if you know any of the new peoples work.


One other piece of news that I can share at the moment is if you get a copy of Simply cards and Papercraft magazine this Month , out on October 10th , there will be a rather large feature for Craftwork cards and I have several of my cards from their Christmas post range in the mag.
Also Creative Card making mag out on 15th November will have a feature with a card of mine in this time too. 
I would like to say a huge welcome to the new ladies that have signed on and please comment when ever you can and let me know which of the Artwork displayed catches your attention , I love to read your comments and see that I am on the correct path so please let me know what you think.


Have a great day today as it will be fab weather apparently(if not blame the BBC) lol
and I will will post Monday for Craftwork so see you all soon.


Love and crafty Hugs 


Kim 
xxxx

Wednesday 25 September 2013

Heartfelt Wednesday.

Hey everyone

Today is dedicated to Heartfelt Creations and this week I made a card using both the recent Christmas collections that they released.  The Season of Joy collection with the  Frosty blanket paper pack and The Christmas card collection

This is a very pretty card I made in blues and greys with white crochet ribbon 
 A close up on the wording.

I used a lot of super shiny silver Mirri board for the matting and layering here and added foam in between to keep it all separate but also to add a little depth so I could have some bead strings on top of the crochet and keep the card straight too.
This paper is so very pretty  and all it needed was a nice pearl swirl to bring it to life. Hope you enjoyed today's card.


Today over on Heartfelt creations you will see a list of the new semi finalists and they need us to vote on our favourite so you can see all their lovely blogs from there. Also all the current designers who love to be on the team rely on your votes so you can stay on the team so I am asking everyone to get on over and leave a vote for me and 4 of the other guys to stay on for another term , so come on guys go leave me a vote if you can as soon as possible.

Thanks so much 

love 
Kim 
xxxx

Monday 23 September 2013

Tea Dance Pink or Blue?

Hi Guys

Today is my turn to blog for the lovely Craftwork cards and I chose the Tea Dance collection to make a matching pair of cards, I hope you like them.


I was routing through the papers in the pack and saw these two the same in Pink and Aqua so I decided I'd have a go at it and hopefully you will like it , they are very pretty and not at all grungy for me but still I loved doing them and they were simple to do.
  • Firstly I chose my paper and which frame I would use. 
  • Then I Inked the frame lightly to pick out the pattern and help to tie it in with the project.
  • I then added the frame with foam to raise it up a little off the base.
  • The next mat I chose , I cut out then pierced all around the edge before adding it to the Tea 
  • The the last layer I choose the dotty one but added the ink again to tie all together 
  • All of the above then is added to my 8X8 base card.
  • I added my Craftwork cards sentiment and my flower and leaves.
  • lastly I used a quicky glue pen and sprinkled lots of gorgeous sparkly glitter to the edge of the frame and the flower (this is really hard to see in the photo but the close ups do show it a little).
 Its such a shame the glitter doesn't show as much it looks so pretty sparkling away.


While I was Ally Pally yesterday I was chatting to lots of people and the subject of Inky fingers came up , There are so many different products on the market now to try and clean dirty mitts but my favourite item is Grime boss wipes. I was at the stand chatting to them Sunday as I use them for the cooker hood and the window ledges etc so not just ink but I used to have to bleach my fingers at night so you can image how sore they were but now I use these wipes and they are fab but that got me thinking as to what other people use and what better way to ask, can you leave me your comments and let me know please.

OK back to  the pics for today's gorgeous Craftwork Cards 
 Inside 'pink'

Inside 'Aqua'
Its lovely to match the inside of the card to your project and in this pad there are so many papers that you don't feel like you have to scrimp and save it .

So here they are in Large format so you can have a good look .
let me know what you think.

Have a wonderful Monday and I will be back for Heartfelt  Creations Wednesday post so please come and join me also if you fancy chatting feel free to add me on Facebook and we can have a good old chin wag bout anything crafty or even not so crafty things haha.

lots of love 

Kim 
xxxx

Sunday 22 September 2013

Visible Image Sunday and Aly Paly weekend news.

Hi friends.

How are we all?
I hope you are doing great. I have had a brilliant weekend so far.. Today I went to the glorious Alexandra Palace affectionately called Ally Pally here. It was a lovely day and I could see for miles down the hills and over Muswell hill etc standing outside the palace.

I met some ladies Tina and Georgina from my Craftwork cards design team and also Tina's lovely friend Karen, ladies it was an honour to meet you and sit and have not so nice coffee but coffee none the less before piling into the show and splitting up to go hunt down bargains. We were chatting away and before you know it it was 11.30 already, I had a walk around and picked up some bargains and then met an absolutely amazing lady called Lysanne who is part of Creative Expressions along with the wonderful Sue Wilson, I cannot begin to express how warm and kind these two ladies have been toward me and I thank them both from the bottom of my heart. (watch this space to see what is coming from here woooooooo exciting is not the word.)
I am also going back to the show Sunday(today) to meet up with another lady I haven't yet met from my heartfelt Creations team, I can't even remember how we found each other now but we have been chatting around 7 months now and this will be our first meet. Nikki I cant wait lovely lady.

Now sorry If I am waffling.. I actually have 2 lovely long weeks off of work and so am looking forward to a lot of craft to show you all. The time will fly by but for now I am sooo looking forward to this time.
I got back from the show and as today is my day to post for the amazingly deep etched and detailed Visible Image I was going to make something with the stamps I had already but I had special post form Mark and Helen who are the very special owners of Visible Image and In it was the most wonderful snow flakes and verses so of course I used these instead. I am very thankful to them both for the little gifts we receive. Bless you both.

Here is my card for today.

 So sorry the photographer (ME)  hasn't taken amazing shots of this one but it was very late and the light had gone so I will exchange for better once I get back from the show, The card stock is a pearlised Navy blue and i have embossed the snowflakes in white and then silver and cut the silver once out and added them on top of the plain white ones then added blue Promarker to the outer edges and iridescent glitter than is soooo sparkly.
Rolled flowers in organza and lace and pearls finish this off.
 The verse is called  'Winters Miricle'  and is truly beautiful. The snowflakes are 'Enchanting snowflakes' and the more you look at them the more you seem to see. This shot certainly shows this card at a more classy angle and is lit a little better.


   Enchanting snowflake.                             Winters Miracle

What do you think? comments always gratefully received of course.

 I certainly seem to have made a lot of Christmas cards lately and I have some amazing ideas in my head for some vintage and wonderful things that today inspired me with. The windows in the palace for one certainly have a Gothic under tone and I would love to distress something with an arched window and spooky it up for Halloween.

Anyway my lovely crafters I hope you like this card and I will have some really special news for you very soon I promise and don't forget the chances to win some fabulous items too as soon as I hit my first 100 followers then we will be in to Competition time and woo hoo have I got some lovely prizes.

Have a wonderful day and I will post again on Monday.


Love always and keep crafting

Kim 
xxxx


Wednesday 18 September 2013

Heartfelt Season of joy.

Hi Everyone

And a huge welcome to any new ladies joining the blogland of craftiness. I will be running a competition once I reach my first 100 followers so please get your friends to join if you like it here of course.
Today was Heartfelt Creations Wednesday except for me in this strange world I am in it has been Tuesday all day so we will have to pretend lol I did 2 cards this week to make up for having no Interwebby last week  and here is the first.

It is the Season of Joy collection and it is stunning.
 I added another door and sleigh raised on foam to make it stand out from the paper.
 One of the beautiful stamped sentiments from the collection.

Lastly the gorgeous Christmas tree die and baby snowflake so stunning and intricate.

The next card I wanted to go for a different look. So I used one of the sentiment stamps, the smallest in the pack to create a background and inked the edges then wiped it back with a wipe to make it softer.
The background paper is still from this collection and is covered in microbeads here.
 You can see the soft inked background closer here.
 This stamp is the largest in the set and stunning, so perfect to use in conjuction with your Spellbinders to cut out.
Here you can see the micro bead background, Just.


So you can see I had a wonderful time creating with this collection and soon the 12 week count down begins for Christmas can you beleive that already.... yes already.
I was wondering if anyone had a particular tutorial they would like to see created here if so feel free to leave a comment and ask or if you like a certain die or item and you would like to see how it looks before running out with your pennies and handing them out like sweeties again let me know below... hehe.................
This weekend is Alexandra Palace weekend and I will be going and meeting my lovely buddies at the show some from my teams and some new people yet to be met face to face and I am looking forward to it immensely. I will post my stash haul at the weekend when I add my next blog.
well guys have a brilliant day and at least hump day is over,  some of us didn't realise it was the hump of the week so I gained a day and look new friends yayyy.
Hugs 
Kim 
xxxx


Sunday 15 September 2013

Visible Image and Free your Imagination Sunday.

Well Hello to all on my little bloggly site.

Firstly I have to say to all who have had internet issues arrrgggggggggh, how annoying is it that you can't blog and who said it is easy to blog from your phone because Noooooooooooo it isn't haha, well it isn't if your me that is but Despite a shaky two calls to India Virgin redeemed them self by sending a very very nice man who gave me a shiny new contraption, housing not just a new modem but a new router and all is well in blogland again.. he even made sure me and number two child's phones connected to the net too so here I am to thrust upon you some new artliness ( is that a word.. hmmm well it is to me and I speak Kimglish).

I missed last weeks Sunday post for Visible Image so here is this weeks to make up for it I hope.


I used lots of their gorgeous stamps for this piece and I really enjoyed getting my inks out and getting mucky again.
  • I started with the Background and used the Crackled Background and my Frayed burlap Sir Tim of Holtz ink.and stamped all over an A5 piece of white card.
  • Then I took  more inks and blended them into the background , I used tumbled glass and dried marigold to start ,Then on the outer edged I used faded jeans and Rusty Hinge on the colours respectively.
  • I then took the Bronte border and stamped randomly in Versamark brown ink. and dried with my heat gun to set it all. I ran an anti-static pad over the whole thing then several times to dry it thoroughly.
  • Next I took the same stamp and used my versamark all over it but keeping a random pattern stamped over the background again, this time I sprinkled a True white embossing powder all over it and heat set again.
  • I then took the Grunge flourish and Walnut stain and stamped it just in 2 of the corners and blended the ink a little on the orange shades on the outer edges.
  • I used the Ink splats and Chipped Sapphire ink and stamped randomly just 3 times was enough and also used it on the edges of the blue shades on the background. A lot of work goes into the backgrounds but it is so worth spending the time on them as it looks amazing when put together.
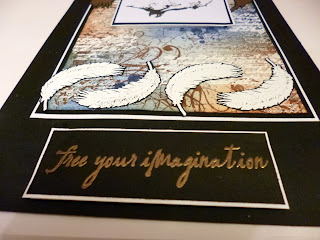
  • Ok so now I mounted it first onto a piece of black card and then onto a piece of white leather effect card and set aside. I stamped the free your Imagination Phrase from the stamp set of the same name on black card and embossed it, along with 2 of the large feathers in gold embossing and 4 of the small feathers in true white embossing powder. I also stamped the inky bird from the same set onto white card which I cut and mounted on black and  then white card.
  • I cut out all the feathers leaving a tiny border of the black card showing, just enough to make it stand alone from the background.
  • Then I took a large piece of black card and mounted the background to it. I added the two gold feathers to the top and the four white at the bottom in the middle I raised up the bird on foam to stand out from the back ground and I did the same with the phrase at the bottom.
           voila my  piece of art with these fabulous stamps is created. I have so many pictures so I will add then below along with the stamp pictures too. Let me know what you think as you all know how much I love your feedback.
 Free your Imagination in gold embossing power on black.
 White Embossing powder on black, remember the tiny black border,see how it pulls it out form the background.
 Nice close up of the background texture and the gold feather here.
 A slightly closer look at the finished project.
                                Ink Splats.                                                    Bronte border.

                                     Crackled Background.                     Free your Imagination set.

                                                                 Grundge flourish.


Well I used a lot of stamps this time to build the layers needed for a truly textured background and your eye travels straight to the bird and then to all around the scene and can do so comfortably without getting a sense of emptiness in any part of the frame.
Technical hey lol
Who cares as long as you love it as much as I do and as much as I loved making it. I hope you have a lovely restful Sunday and I look forward to seeing your comments.

Lots of crafty hugs , I missed you guys this week in internetless baron lands.

Hugs 

Kim 
xxxx


Wednesday 4 September 2013

Heartfelt Wednesday.

Hey folks

Yes that's right it certainly is Heartfelt Wednesday and the card I made a while ago now and sent it to CHA in Las Vegas with the lovely Sue Wilson is finally making its debut on Heartfelt creations today.

That's right no stage right for her today , she very simple and classically elegant and is from the collection that was launched at the beginning of the month, The Christmas card collection. , of course we are just one week away from the new launch and wow is everybody in for a treat. My goodness just as soon as one collection comes out and wows me another one comes and totally surprises me and tops the last. Well done Heartfelt I am loving being a part of the team.

So without further ado
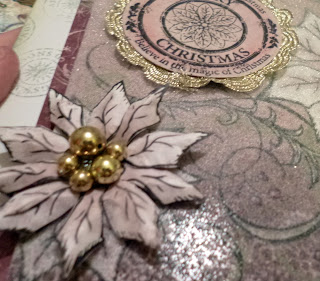
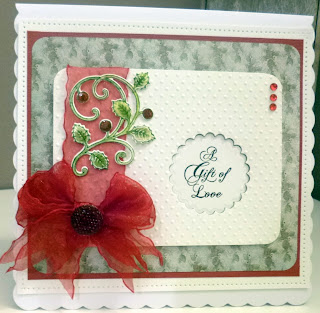
My Christmas Gift of love card.

This was one of those cards I didn't know what I was going to make I just started to make and see what happens cards. I was pleased with the result though. 
  • I took a piece of the paper from The Christmas card collection an layered it with a red mat then a pierced mat. All onto an 8x8inch card base.
  • I then took a piece of white card an cut out an aperture.
  • I stamped the words I wanted looking through the aperture.
  • Then I embossed the piece with dots and wrapped a red ribbon around.
  • I stamped the classic holy an cut it out with the matching Die.
  • Colouring in the holy and putting on glossy accents just on the holly berry parts was next.
  • Lastly 3 red stones and a big red crinkly bow, Lovely.
that paper from this collection really sets the card off with its simple holly reflection.
 As always I will add this card to my sites on Twitter and Pintrest not to mention facebook Please join  the blog if you aren't a member already I would love to have you.

Anyway sorry its a small post  but have a great day. Don't forget to pop over to heartfelt Creations to look at their blog, with all the designs teams amazing creations and of course right now there is a call open for them too so if you think you would like to be part of this great team why not try out?


Kim 
xxxx


Monday 2 September 2013

Visible Image September Challenge

Hello Everyone.


Oh no.... I has that Monday feeling oh dear , dragging my feet off to the office ,If I had a school bag I'd be dragging it behind me on the floor. Ha ha What is it about Monday ? it isn't any different to any other day and yet we never like the first few hours of Monday at all. The rat race begins.. Now if I could craft all day and have a "real job" in the craft industry then I would be one happy girlie even on a Monday.

One thing though to definitely cheer us all , There is a new challenge over at Visible Image blog 
Congratulations to Sharon King who did a fabulous tag with Max Rocks set of stamps as chosen by Mr Random for the August challenge, she can choose her some newwwww stamps back at Visible Image woooo hooo.
So September challenge is on and the theme this month is Sentiment. So Its all about the sentiment, go off and get crafty and get entering guys.

There are only a few rules No digi's and use a Visible Image stamp. the item you create can be anything and once you blog it you need to mention you are entering the Visible Image September challenge and lastly you must be a member of the Visible Image blog. Simpless.....
Good luck with entering everyone and the winner gets to pick £20 of stamps of their own choosing at Visible image head quarters. Very nicely does it guys hey...


I choose the verse created and written by our lovely Helen at Visible Image.
 
 Around the edge in white embossing you will see the Bronte border stamp too.

 I created the flowers from a lovely piece of lilac card and so with the negative space I mounted it on grey and white and added some lace and voila another card.So you get to use the waste too as its so pretty with added sparkles.

Well I hope you enjoyed this post and will leave me your comments as always let me know what you think or what you have made with your negative space and Sentiments recently.
Don't forget to enter this fabulous challenge , the stamps are very reasonably priced so you can get a ton of bargains with the prize if you win but you have to be in it to win it as the saying goes so get crafty.
Have a great Monday and I will see you really soon.

crafty Hugs 

Kim 

xxxx

Sunday 1 September 2013

Visible Sunday.

Hi all my lovelies in blogland.

So its Sunday again.. already. Where or who has stolen the weekend? I feel like I only just left work thinking yay its the weekend. Still at least we have the whole of Sunday as yet.

So its my day to blog for Visible Image and  I had a play with the stamp set called '"Time after time" Which I love.. I love to use vintage images where ever I can  but this time I thought I would try something a little different and created and easel card.


Within the set there is a fabby crackle stamp so I used that to create this gorgeous background. I also inked around the edges . Separately I stamped some of the images from the set, the cogs and numbers, The word 'Time' and my sentiment. I cut them all out and did any inking needed.
I then mounted them all onto black card stock and put the card together.

Glossy accents was used literally all over the face of the clock after using a light grey Promarker all around the inner edge. You can't see the grey at the mo cos the accent's is still wet but as it dries it seems to sharpen anything you do almost like a magnifying glass.

 You can see the glossy accents all nice and shiny here.
 Nice close up of the background and numbers stamp too.

 My easel
 I love the sentiment here cut out with a Spellbinder die, d-lite.
The wings I cut out several times this photo shows the layers and also how it looks folded closed for posting if needed.I used a ribbon I had that looked like a measuring tape which is very me although usually Id cover it in ink and screw it up maybe but as I said before I thought I'd try to keep it clean and simple as these stamps are so deeply etched and detailed they really don't need much work at all.

I hope every one has a great day with lots of sunshine and I will be back on Wednesday to share another Card from the amazing Heartfelt Creations.

Please  leave me a comment and let me know what you think of today's card It really is great to get feedback and tell your friends to come join the blog too as I mentioned before I will be doing a freebie competition once I hit my first 100 followers to the blog so please share me to facebook etc so we can get the numbers a little higher.


Hugs.

Kim 
xxxx

Time after time.