Showing posts with label Periwinkle card. Show all posts

Thursday, 30 April 2015

Creative Expression's Thursday

Hi folks

I hope you like this one  it is completely different from yesterdays except they both had butterflies lol , yesterday was real artsy and inky butterflies soaring amongst the dragonfly and today's are much more whimsical and abstract. I love the colour of card on this one too, I remember seeing a huge Harley Davidson Motor bike many moons ago in this exact colour scheme a very nice blue with white wall tyres. Anyway without further reminiscing haha.

Here is today's card , a simple, Thinking of You sentiment today.


This is a nice easy one for you today, I have used Periwinkle blue card with Milk card from the Foundations cardstock line for all my matting  and layering.
To start.


 I took a small square of Periwinkle card and using Perfect Medium embossing ink and True white embossing powder I started by stamping the Oval frame with the Butterflies and bubbles from John Lockwods Butterfly Dreams set of clear stamps and heat setting I then chose the sentiment I wanted from the same set, as there is quite a choice with this collection of stamps. I again stamped and embossed the words.
Next I took the small stamp that looks just like groupings of bubbles and again perfect medium and began adding the pattern randomly around the edge of the page , Once I got to the end I checked to see I was happy with the pattern.


I took some Salty Ocean Distress ink and a water brush and filled in some of the bubbles with the colour to deepen the pattern edge.
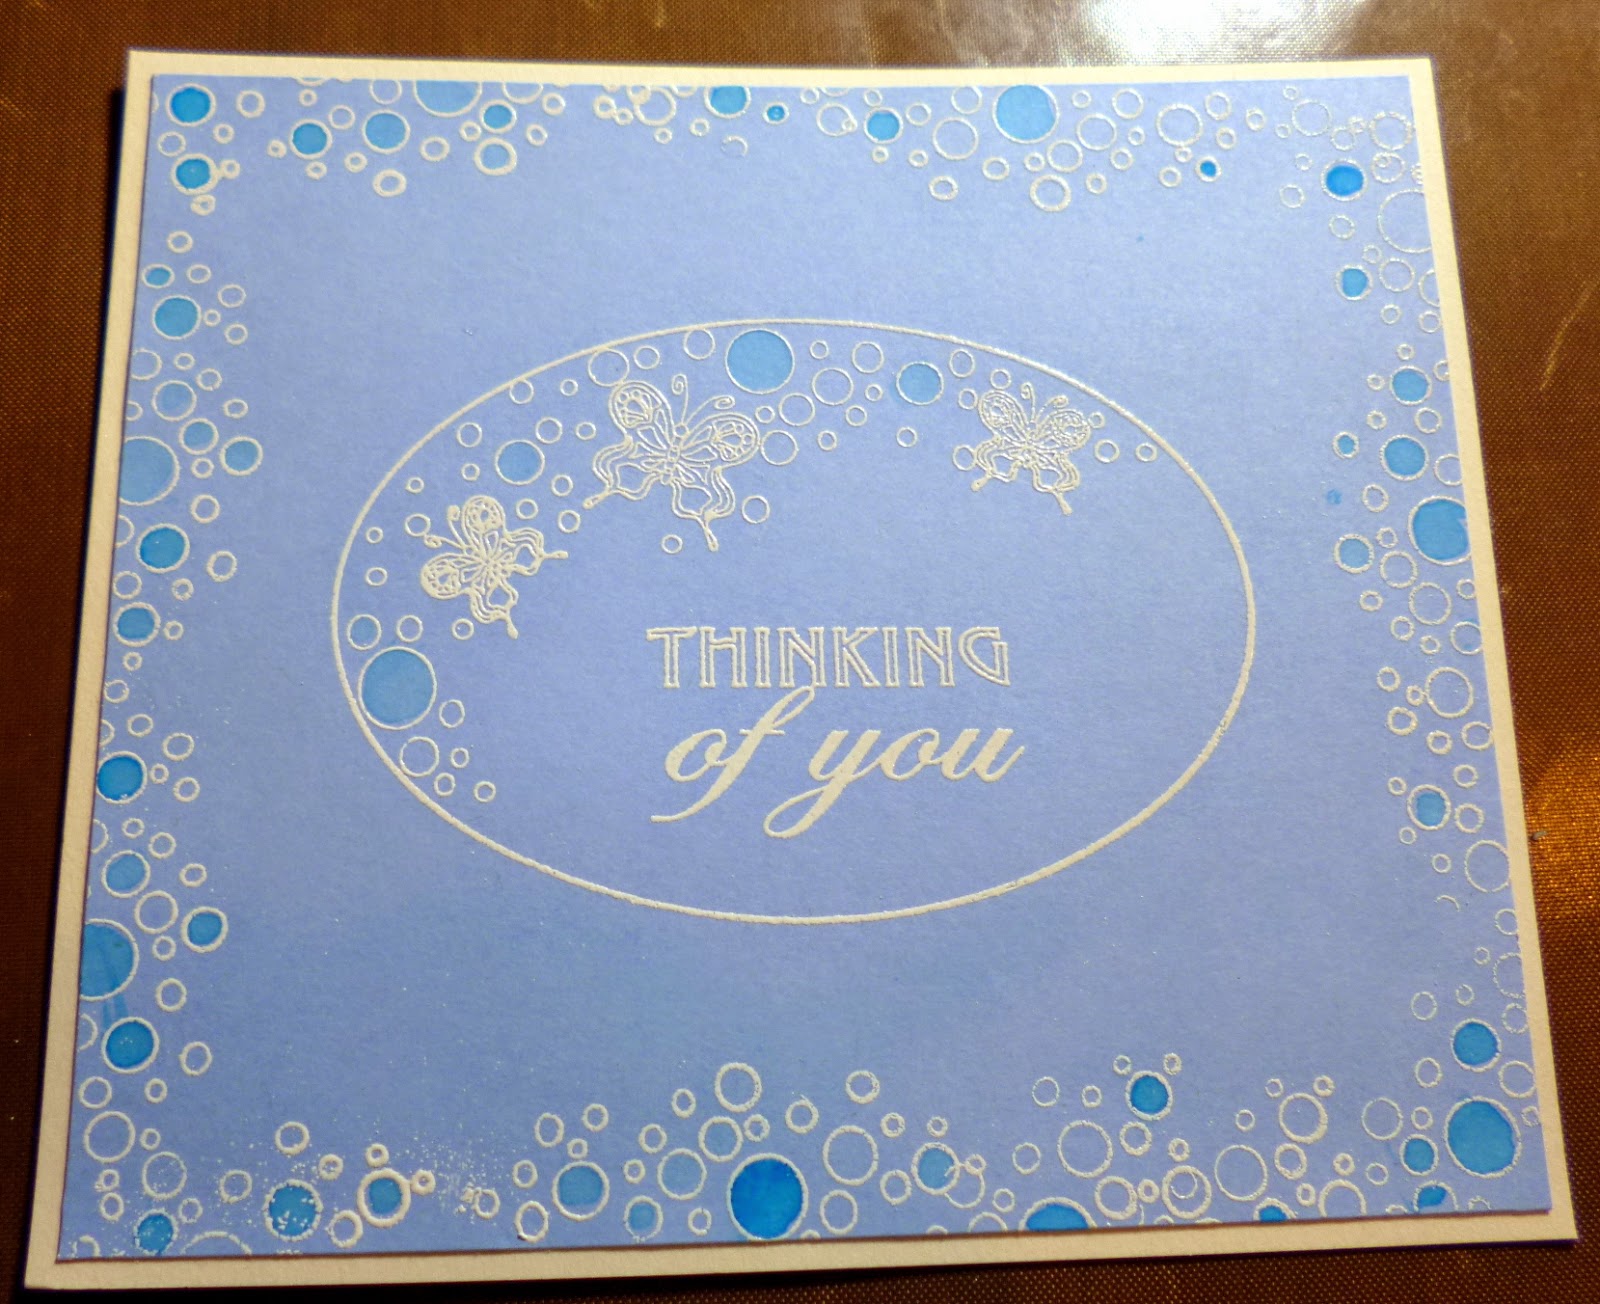

I also matted the blue card onto a piece of milk card for stability at this stage too. I also coloured some of the circles with a Stardust sakura pen in a sparkly gold colour which is very translucent so you can still see the blue through it from the card.


Again a couple more layers of card before I set this piece aside to work on the backing section for this front piece to rest on with foam in between.


So as you can see here I took another piece of the blue card and wrapped it with a small strip of White crinkle edge ribbon which is one of my favourite ribbons, itis so very versatile and can be melted into flowers too so absolutely no waste with any of this one, even the smallest pieces. I then backed that blue card with 2 layers of milk colour card and then I added foam to the back of that before mounting on to another piece of milk card. This was my backing piece for the first section we worked on with the embossing pattern.


I tied a bow from Crinkle edge ribbon which is one of my favourites as it is so versatile, even the smallest pieces can be saved as it can be melted into flowers etc.
I had some small wooden butterflies in my stash so I inked the edges of one and added that to the bow to cover the knot and a little bubbly pearl on top of that.

I stamped one of the little butterflies and cut out from the blue card and added some sparkly pen to it.
I also added some Little pearls to the centre on random of the little bubbles /circles in white and blue and in several sizes for something a bit different.

Here is a couple more view of the full picture again.

 Here is the central section with the pearls.

And lastly he full image again.


Hope you all have a lovely Thursday with lots of love to all


Kim 
XXXX

Sunday, 9 March 2014

Visible Image Sunday

Hi everyone
I hope everyone has had a very nice week and a nice sunny weekend so far and today or at least down my way is supposed to be nice and sunny and warm how lovely. It definitely makes you feel better as soon as a bit of sun shines through doesn't it.

I have been in the old craft room today creating a card for Visible Image and I went for that classic Periwinkle blue and Milk Foundations card team again as I do love it. I also used another of their new flower and verse sets recently demo'd by our Mark on C&C. This time I used The Thank you set.

I stamped out 3 flower heads and stems in Archival blue violet ink and then drew around one side of each flower in Broken china distress pen and dotted the centre with Picket Fence distress pen. I then went over the darker colour with little dots of the Sakura gelly roll clear star pen this one has a silver sparkle but it comes in lots of colours, I also stamped out the thank you sentiments and measured how far down it would come on the page so I could add the verse.
 This is the Archival I used on this one and below is the 2 distress pens.
( How I would love to have the big tub of these to do some art with) hmmm
I also used
This was used to ink the flower for the rose and rose buds and also for the edges of the embossed milk card too.
 Here is a close up of the flowers stamped onto milk card with the Blue violet then broken china distress pen was add one side of all the petals and one side of the stem. Then the sakura pen was added for that sparkle. All three were added onto Periwinkle blue card and then navy card. I used 3 mm foam to adhere them to the milk card that I embossed with this subtle dotty image.
 This is my full rose bloom made with the Majestic bloom die from Heartfelt Creations on top of one of their Classic leaves also, which I inked using adirondak inks.
These are the three small buds also made from the same die but using the smallest flowers, all four flowers the full and three buds were made with one set of flowers from 1 pass through the Grande calibre die cutting system.
 Here is The little Thank you mounted on just a small piece of the raindrops on roses die from February's launch for heartfelt creations, below you will see a whole die cut , where I took my small piece from.

 I tied a messy bow using Blue seem binding and blue and white bakers twine with a dazzler in opaque blue on top. Here are the two below that I used.

Of course we have another fabulous verse from Helen at the bottom stamped again in the same blue violet archival and broken china added to the right side of each letter then the sakura  sparkle on top.

 A different view to see the dimension.
Lastly a few flat back pearls added.
Here is the stamp set 
"Thank you"
that I used.
So I hope you enjoyed today's card and that the beginners among you will give it ago as it really is only the flowers that are intermediate on this one so have a go and remember I'd love to show anyone work if they have seen anything on the blog that They were 'Inspired by'.

Why is it we always want to spring clean or think about it at least as soon as the sun shines anyone know? I was at that well Known Swedish store getting more boxes and storage items so I could get a little more organised in the craft room, what do you all store your stash in?
Lots of love 
Kim 
xxxx