Showing posts with label spellbinders. Show all posts

Wednesday, 21 August 2013

Heartfelt Creations Wednesday.

 Hi lovely blogland.

Today has been Heartfelt Creations Wednesday and the feature for this month is their new collection, The Christmas card collection. 
They have taken a paper pack and popped in sooo many designs  for almost ready made Christmas  cards and all you have to do is add a little sparkle and a bit of flair, the rest is done for you.
I have already shown of a couple of the cards on the website so I will add them here


 I love this collection. You can make it as technical as you want or simple like I did with this one.
 Everything looks like it popping off the page but it is completely flat.
 The paper collection really is a work of art and the blue is the perfect Icy blue, like frozen lakes for Ice Skating on.
So the paper pad has 76 card fronts already done for you, all you have to do is cut it all apart and add glitter or cut out with a die, I used a spellbinder distressed edge one here plus of course the gorgeous Heartfelt decorative blossom corner made by Spellbinders so of course only the best.

So how is your week going , has the craft mojo been all fired up ? or has it left for a mini break. Come on guys tell me how you get yours back after it flies the coup. I am lucky to work with all these amazing companies ,my imagination is fired as soon as I get such amazing products through the door.
So today I received my distrezz it all machine which should make life so much easier when I need to distress the paper and other substrates as it seems to take an age doing it one by one. I will let you know how I get on with it but so far so good, small  pink and cute for the desk  although it does sound like an electric saw while you get the blade running. (guess that's kinda the point lol but it is noisy , although I do not mind at all if it does the job, watch this space) next stop.. Bind it all.

Anyway have a wonderful day week ahead and i will be back in a couple of days with lots more inspiration for you all.
Crafty Hugs.

love

Kim 
xxxx

Wednesday, 8 May 2013

Sun Kissed fleur.

Hi lovely crafters.

Well haven't we been lucky with the sunshine this week here in England, gosh you could have been fooled into thinking we do actually get a summer lol....
well spring ... well warm day or two. hmmm 

Anyway did everyone had a fab bank holiday then ?

I am settling into a new job after leaving the one I was in for 12 years and I am doing fine. I certainly have a lot more crafty time and no longer working on my Saturdays which is aways going to be a good thing.
This week I shared with you my fabulous news regarding The Heartfelt Creations DT so today was the launch of their newest collection called Sun kissed Fleur and I was lucky enough to receive the entire pack last week so today I would like to link and share with you the first card I made for them.
This collection was so easy to work with and the flowers all cut out from one die , so you can make 10 flowers in one pass through the machine, plus you can stamp all 10 before you cut them out so the possibilities are endless.

Lots of distressing and just look at the papers. 
Emma Lou has put some really inspiring videos on to The Heartfelt blog and 
I would love to see some of your comments on it as you have up to the 14th of this month to add your comment before someone wins this entire new collection worth over $180. How generous hey...
So have a great Thursday tomorrow and it is nearly the weekend with our short week following the Bank holiday .. what do you plan on doing  with your weekend and who will be crafting?
 
love as always my crafty friends
 
Kim 
xxxxx


Sunday, 3 February 2013

Autumn or summer? you choose...

Good evening, everyone!

Well, it is Sunday evening at 9pm and I have had a lovely weekend, just the right mix of relaxing but not too much. I have done some shopping and got a nice bargain or two for my daughter to take on holiday soon.

I managed to get some boots with a huuuuuge discount for me too, so I am a happy bunny. I have caught up with friends and a few chores and then in the middle of all that a little of my favourite thing... a lovely card for you all to see. How about you, did you have a good weekend? Are you still enjoying it or are you relaxing in bed after preparing for the next round of rat racing back to work?
If you crafted what did you make? I'm feeling a little inquisitive I think, haha... Well without further ado... Here is my little bit of the opulent I think:

So pretty and girly too...
My backing card was a blank from Craftwork of course as they are so very sturdy and definitely would never buckle like Bambi legs while standing proudly displaying itself oh nooooooo there surely isn't much worse than trying to stand a card and it just sliding down like a drunken sailor down a wall. hmmm random... 
  • I took some milk card and die cut the matching Grand label 1 spellbinder.
  • Repeated with my Beautiful Creamy Craftwork paper with swirls foiled in gold... (very strokeable) in the next nesting spellbinder. Matted and layered then down with my Collall multi use glue. Seems to give strength and stability to the card front.
  • I then took a co-ordinating paper in a more latte tone and tore around three edges and inked them with Lord Tims (ahhhhhhhhh) Distress. I also took a water brush and made the raw pieces slightly wet so I could roll it easily around the edge of a brush but you could use anything tweezers a ball tool absolutely anything you are familiar with using. I adhered this to the right opening side of the card, which I forgot to say is 8x8.
  • I took a thin strip of gold mirri which has a leaf pattern embossed into it and ran it down the middle edge of this paper. Not sure why other than I liked it and it called to me.
  • Then die cut a D-lite pattern and added it on the left in latte card, also a circle from the same mirri and a CWC sentiment which was mounted on foam to raise it a little. 
  • I took some ribbon form Crafter's companion with a ruffled crinkly edge in a champagne colourway which looks so pretty, I made a bow added stick pins and a decorative clay element to the middle, those of you who know me know I just cannot leave a bow naked, I do like to add something and on top of that I added a Candi. I set that aside to dry out while I made a start on cutting my flowers for the bottom.
  • I took the same shades of papers and cut some spirals with my Grand Caliber and then sat making them up and curling them, gluing them and getting them to look how full I wanted them. I also cut some random circles out of my ribbon, some medium some small, and stood them on my craft mat, holding them with a metal pokey tool I added heat until the ribbon buckled and melted  a little making it look sooo pretty and then added a sparkly brad in the centre to hold them together. Now, I must thank the amazingly talented and super nice Sue Wilson for this I saw her demo it on Create and Craft and dived right in to try it, it's fab so Thanks Sue. Lastly, for this section I took my Mirri and cut out the leaf pattern by hand just randomly and cut two leaves for either side and mounted it on foam just in the middle for a little shaping, I also added a Candi on each.
My dressed bow .

My Flower section.

Sentiment on Mirri and D-lite in Latte.
  • So, after this I glued my bow in place and my flowers too, I finished off with a few Candi but also some pearl swirls cut from one large group of swirls, which was enough to do three different areas of swirls peeping out from the bow etc.
  • My last piece of work was to stamp my beautiful personilised Clarity stamp on the back simply saying Designed by Kim. And to decorate the inside as all cards need that to complete them and make them look finished and professional. Below is the inside finished simply and elegantly with Craftwork card's gorgeous papers.

So lastly, I wanted to share some news with everyone, as you all know I am now designing proudly for Craftwork Cards in the UK and having a great time as the team have to be the nicest people I have ever met in craft so far and yesterday I did my first blog post for there blog which was great and very well recieved, it was the same as I posted yesterday on here but if you fancy a look over on their blog all are welcome.

http://craftworkcards.blogspot.co.uk/

Now, I was lucky enough to be chosen to also design for another company called Memory maze this week and I am so super excited. They are based in Australia, and the co-coordinator is Linda Thompson who is very talented with scrapbooking and they make the chipboard shapes used in scrapping and card making, altered art etc. and I can't wait to get started, we are planning for a March start by the time I get my pack so please watch this space, I am sure the eagle-eyed of you will have seen another badge go up on the blog anyway, haha...

Their blog is definitely worth peeping at too and is http://memorymazedesign.blogspot.co.uk/ and there is a feature on me on the first page at the moment, yay!

I think this must be my longest post haha! Sorries if you got bored or yayyyy if you like long posts. Have a super fab Monday and hopefully I will be back Tuesday for more postiness.

Thanks to everyone who left me comments on my Craftwork blog and my facebook /twitter sites. I appreciate every word and will always answer you. Kind words take a moment but mean so very much.

Crafty hugs

Kim xxxx

Wednesday, 14 November 2012

Christmas Craftwork Style..

Good evening Bloggers,
Haven't been on for about a week, so I'm sorry to have neglected Blogland! I have had a horrendously busy week but wanted to share a card I mad for Craftwork cards using their gorgeous Christmas stock.
The lovely and amazingly talented Julie asked if I would do a few Christmas cards for them and sent me some lovely stock to design with and this is one of the ones created so far.
What do you think?

  • I started with the musical notes background made by Just Rite stamps which I love right now.
  • I matted it onto the beautiful glittered paper from Craftwork Cards... sparkly goodness which isn't showing in the picture but it has this green glitter all over which lights up soon as the light catches it.
  • I matted that on to black then onto milk card and added some more sparkly paper just at the sides which was matted onto a piece of red card. All of this is then added to another black mat to my Kraft card base.
  • Cutting out one of the card wraps and attaching to the top right came next. A bow to the top left with a dazzler in the centre, no naked bows here... 
  • I  added two wraps of mink colour ribbon top left and bottom right also before cutting out some swirls in the green glitter card and also the chevron sparkle paper. I added the chevron swirls on the left with a made flower in centre and the green ones you can just see under the flowers on the card.
  • I had already made up lots of ther flowers from the Craftwork Card Christmas pad and used several that matched on the bottom left.
  • Next, I stamped "ho ho ho" with the print font also Craftwork onto red paper, then matted onto black, covered in glossy accent so lots of shiny goodness.
  • Lastly, I inked my sentiment and added it. Also, I added lots of card candi and liquid pearl drops, plus a piece of skinny sparkly green ribbon up the spine of card, and added some extra pieces tied off and snipped to look like tinsel.
Well there you go, I hope you all enjoy this card as I really love how it has turned out.
Sorry again for disappearing for a while, more tomorrow from me!
Kim xxx


Tuesday, 23 October 2012

Gorgeous Kanban

Evening , well actually just turned morning, where does time go, just disappears.
ahhh well .. I was digging in my crafty stash to see what inspiration hit and 2 things Kanban and Spellbinders and I was off.. here is my creation for today, hope you like it.
  • I started by matting this pretty Kanban card onto black card then I cut out the black fretwork in the back. I cut my sentiment and flowers, butterflies, swirls and cut the scallops off the fretwork for the bottom of card, all the element except the black fretwork was cut from the vintage paper pad also from Kanban.
  • I glued down just a little of the fretwork either side of where my topper was going. the outer floral frame was next to be added then my topper which I used Pinflair glue for so I could mould a more domed effect to it.
  • I rolled up my flowers from the spiral flowers number 1 from spell binders,  then painted them blue, drying them with a heat tool between layers then  added some pan pastel to the edges. I cut a few other flowers, one I added a butterfly to the other an iridescent stone to.
  • I used the heartfelt stamps to stamp the pattern on my sentiment and embossed it in white. very pretty.
  • A messy bow and a few more sparkly stones and swirls plus some sakura pen on the  roses for some sparkle and it was done...
Here are the flowers, you can see I cut into the fretwork to create leaf effects.
I love using Kanban as the quality is always great and uncoated cardstock means I can alter things just how i want to.
Anyway guys have a great tuesday and hope the weather stops this horrid rainging, soo miserable and was even foggy this a.m Typical british weather thats for sure.

Take care
Kim xx


Saturday, 13 October 2012

Lattice Bloom.

Hi All.. goodness what a long week.
I'm sorry I haven't been on here much AGAIN this week.
But I hope my card has made up for not being on. I really like how pretty this one came out.
I used my new spell binder dies along with some love Craftwork cards papers and Tim's inks as always.
I cut out my rose and leaves and inked and glittered them , so pretty and you can see some extra flowers made from Craftworks vintage pad with lots of lovely flowers.
This was my Sentiment which was on the Rubbernecker stand at Ally Paly on the day Sue Wilson from spellbinders was there too. I got a whole bag of sentiments etc for a fiver.. nice.
I did quite a bit of matting and layering for this one with a nice gold Mirri card. and the lattice was cut and mounted onto foam to raise it up a little too.
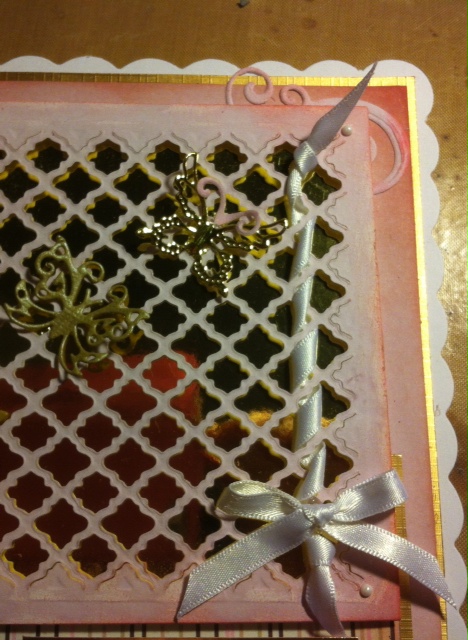
I weaved a little piece of ribbon through the lattice on the right added a bow nd 2 tiny butterflies I cut from my dies too. I sanded the edges of the lattice and rubbed in some ink too.
different but nice.
Hope you have a great Saturday folks and that it doesn't rain anymore.
Sorry it isn't a long post but i will be back tomorrow
love
Kim xx


Sunday, 7 October 2012

Fabulous..

Hello everyone, hope you have had a great Sunday!

My son went back to university today, so there was lots of blubbing, but that's just me as always. It's funny, their nanny used to blub every time we all left her after a holiday with her, and now I know exactly why she felt that way. He is doing fantastically well with his PhD though, so I am extremely proud of him and all his achievements.

I got back in from dropping him off at the station and I had tea waiting for me, so my daughter knew how I was going to be upon walking in the door...  haha!

Anyway, I still managed a little card this afternoon before he left, so I thought I would share it with you.


Small, but perfectly formed.
Have a good Monday everyone...
Kim xx

Saturday, 6 October 2012

2 post Saturday.

Evening all, I have 2 cards for you tonight.

The first is very feminine, and the second is actually pretty masculine.

Hope your all having a good weekend so far, and I hope the folks at the Great North papercraft event up in Harrogate are having a great time, (I so wish I was there). I hope my cards got to Craftwork cards in time to be at the event too. Anyway we are having really rotten rain here in Hertfordshire so I hope you're faring better where you are.

Have a great Saturday evening, or what's left of it.

This is a bit of a hybrid haha, I used the spellbinders Pick of the day I got from create and craft, but I did it with Kanban card stock and used creative expressions ribbon and pins. The background is gorgeous; it is one of spellbinders new A4 embossing folders, yummy. The lovely sentiment is also from Kanban and was Dawn Wheeler's kits which were really pretty vintage kits that came out just a few months back and was very nice.

Next..
This one I started with the animal print paper and mounted it on black card stock. I cut out a background piece from white card and inked it with distress to match the back. I wrapped a ribbon around and added a small bow and a piece of Candi.

I cut out this very ornate small d-lite from spellbinders, which I mounted on black card again. I put the lattice onto mounting foam to raise it up fro the design and then I used some black enamel accents from Ranger and placed small dots in the cross of the lattice (took a while neck now killing lol). I
added my sentiment which I inked and added Best wishes to.

Very happy with that.. I can do a man's card woo hoo...
See you tomorrow guys!
Kim x