Showing posts with label sentiment. Show all posts

Saturday, 1 June 2013

Delicate Aster's & Catch-up

Hi all.

It was a lovely day yesterday here in sunny old Blighty ha( only ducks would enjoy our weather ) mainly cos they could swim through the town. It has been a rough year without much of a spring and certainly not much of a summer so far but today was a nicer day with people walking around in some nice bright colours etc.

 On a serious note our weather is nothing to the weather our friends over the pond have been experiencing and I would like to express my gratitude to those helping the less fortunate out there and my heart goes out to all those who have suffered so immensely due to terrible conditions weather wise.
Take care you guys.

Last week on my crafty quest for Heartfelt Creations I decided to make a little box and then I made the card to go with it, Usually I am guessing you would make it the other way round but me being me always questioning the chicken or the egg haha... nope the box then the card... fitting together VOILA... o so perfectly...
The Result.
It was from Their gorgeous Delicate Asters Collection.
This is one of my personal favourites which I have made into my style by adding inks and embossing powders. By using chipboard , Paint and gold gilding. I have used triple layers of UTEE  dipped in gold embossing too , also added some over stamping to the writing  and used lots of the paper's from The Aster Collection which is stunning in shades of purple, I added distress inks in Milled lavender and Dusty concord along with several greens and some Sakura pens for depth too.
The easel Card.
A close up on this flower as it was made alternating layers of card inked and cut out with the Heartfelt dies and also velum inked and stamped, You can see the leaves with the UTEE and gold dipped edges.
Here is my box , please note all the wonderful colours kept clean and separate but still blending so elegantly through out.
Finishing touches.
The dies matching the stamps cut extremely cleanly and if you are unsure how to do this Heartfelt's Creative director Emma Lou Beechy shows you in a series of video's exactly how to do this technique.
 
I thought this would be a good time to re mention That I have Pinterest and Twitter too so if you would like to come follow me on there please click on the words and it will take you right to it.
Of course you guys know I am on Facebook but again come add me and keep up with all the Craftiness that way too.

So I hope you enjoyed my Heartfelt tribute this Saturday and I look forward to sharing more with you very soon.

Please leave me some feedback as its always gratefully received.

Love 
Kim 
xxxxx

Saturday, 2 February 2013

Sweet Pea Goodness.


http://craftworkcards.blogspot.co.uk/

Hello Everyone.

You may have seen my Christmas cards here on the blog but It's now time for me to take up my role as Design Team new girl for Craftwork cards and share some little cards I made using the Sweet Pea paper packs which are simply stunning and can be purchased over on  http://www.craftworkcards.co.uk/default.aspx 
I absolutely fell in love with the blue tone pad but this one is stunning too. 
If you look in the background you can see some gorgeous paisley embossed cardstock which also happens to be CWC. It came with my Recipe cards, of course you will see some cheeky little Candi in here too.

Some close up pictures to show off the layers of Paisley, Candi and Sweet Pea papers.
Why not have a look at the gorgeous Sweet delights goody bag here http://www.craftworkcards.co.uk/products/2784/sweet-delights-goodybag.html
They truly are sweet and yummy without the sins haha..
Here's my sentiment also from the pad ,I added some gold pen in dots, I thought it would look really pretty as if it wasn't pretty enough.
Lastly of course the inside just has to match and here I think you can see the paisley really well.
Now my little Vintage Sweet pea card.  The DT girls had a sneaky peaky on facebook this week. I love this card ,it just flowed so it was clearly meant to be. Do you love it too?
I would welcome your comments below and of course there are lots of gorgeous bargains in the sale section on the website so go have a look and snaggle  (hmm not sure that is a word but you no, I like it so I'm having it.. snaggle snaggle snaggle .. yup just rolls off haha)
http://www.craftworkcards.co.uk/products/by-category/2/105/clearance.html

I had this card on my blog this week and couldn't wait to share it with you all. The colours in the papers are simply stunning and go so well with all the Distress  Ink shades too and as soon as I opened the pad those colours jumped out ready to have Cut and Dry slathered all over the ink and tickling the corners of Miss vintage here to give it a little extra depth.
Here is a little close up of the sentiment from the pad.


And my little butterfly and flower alighting on the seam binding bow.
Lastly of course as always the inside to finish.
Well I hope you enjoyed this my first time out with the lovely team and I want to thank them and Julie and everyone at CWC for having me and also all the lovely visitors to the blog, I hope you managed to get yourself some bargains I know I will be and I look forward to seeing you all for another post on Sunday 10th Feb and as this wasn't my Official day Big hugs to Emma for letting me stand in for her. Thanks also so much to Karen Hayselden who helped me get started today even though she says I sound south haha, Thats so funny. Bless you Karen.  Mwaaa

Crafty Hugs to all

Kim
xxx


Monday, 3 December 2012

Birdhouses and Santa.

Hi All.
So sorry haven't been blogging so much, I have had so many orders to get done that I have gotten a little slow with it, but I really miss coming on a seeing your comments so here I am, I am still making a few items to give to Craftwork card for Christmas and tonight I thought Id use one of their lovely bird house blanks to make up so here it is then I got a flash of inspiration an thought Id turn it into a box haha, so here it is... hope you like it, let me know.

So for this card/box I took my birdbox card and snipped it in half to start and covered both halves in corresponding papers from of course the brilliant Craftwork cards, the lovely Julie Hickey had sent me a big bag of bits to make some Christmas goodies and so I have been making them up but have also had some commissions for artwork to get done, I have been working on a line drawing in pencil of an MG motor vehicle for a guy I work with.And yet another lady is pregnant so another crochet blanket is in the offering.
Anyway back to the card...
  • After covering each half , I took some very sturdy black card and used my Crafters companian ultimate pro to make a box up that is smaller than the card but still large enough for either a bag of goodies or to put in a false bottom and have some birdies pop up as you open it like a suprise box, something like that, may have even a little faux nest but then I would associate that with Easter more than Christmas .
  • I seem to be waffling tonight maybe it is because its 12.38 and I should I suppose be attempting sleep as Its work tomorrow, really wish My job was in the craft industry, I'm working hard on that but it is very hard to get into. I would love to bring out my own stamp range so who knows maybe one day I will get that chance.
  • I also covered the black box I made just on the outside with again the matching papers, amazing quality they are too.
  • I then attached the front and back to the box and made sure all the adhesives were covered.I added some American seem binding as ribbon around the outside of box and also all over what would be the eves of the house near the roof. Making also a sort of bow on the top inside the roof area by making up 3 loops in varying sizes gluing them in place and adding a small piece of binding around it to look like a triple bow.Finishing it with some candi here and also along the eves again inside and out.
  • Next i die cut the circle from Spellbinders splendid circles for around the window, I was going to cut it out and leave acetate in the aperture but last min I thought I'd use it for the sentiment but I may make another and do that so you can look into the box.
  • I cut out lots of leaves with my Grand calibur too and and the pack of flowers that came with the birdhouses I rolled them and embossed them a little to make them rounder , then rolled them or curled them up, one I made up into like a rose by gradually sticking down each set of petals one at a time. It doesn't show on the picture as I took these photos just before I decided to make 3 tiny flowers with the Donna Salazar bitty blossoms dies from spellbinders (amazing).
  • I made sure my box opened and closed and added some finger holes to make it easy. Glued all my flowers with Pinflair and there we have it, I am still in 2 minds regarding the sweetie or little birdy things popping out but anyway the main thing is done.
I hope that you get chance to come on and have alook If so leave me a comment I don't bite.
Have a great Monday and   hopefully I will get chance to pop on and added the other card I made today.
Love to all
K xx

Monday, 19 November 2012

A Note From Santa.

Good evening all...

Hope everyone had a good weekend and Monday was bearable... I really am not a Monday person , the day I like is Thursday , Thursday is an underrated day I think... it is a nearly there day that is unless it is your Saturday to work, which it just happens to be mine this week errrkkkk... Anywho .
Another Christmas in the Craftwork Inn and A note from Santa was my inspiration...

That and I love this ribbon I found at a local market stall, It has lots of flecks of gold sparkle in the fabric and the ends are wired just enough to mould it into prettiness.

Here is a close up of my lovely sparkly swirls and flowers made with the gorgeous sparkly
Craftwork cards papers , you can just see the embossed back ground , I ran the paper through my m-bossibility folder and ran an ink pad really lightly over it in gold.
then matted my sparkly paper over an added my flowers again made from the flowers in the paper pad.
A spotty Happy Christmas inside with accents in Candi completes my little 6x6 card, part of my project for Craftwork Christmas 2012.
Has everyone started making their cards yet? or are you last minute crafters?
If anyone is on facebook feel free to add me or send me a message or ask anything Crafty, I am always happy to help.
My addy is
www.facebook.com/kim.robertson.3551
Plus I post my cards there too ...
Have a great Monday evening everyone.
Kim xxx


Tuesday, 23 October 2012

Gorgeous Kanban

Evening , well actually just turned morning, where does time go, just disappears.
ahhh well .. I was digging in my crafty stash to see what inspiration hit and 2 things Kanban and Spellbinders and I was off.. here is my creation for today, hope you like it.
  • I started by matting this pretty Kanban card onto black card then I cut out the black fretwork in the back. I cut my sentiment and flowers, butterflies, swirls and cut the scallops off the fretwork for the bottom of card, all the element except the black fretwork was cut from the vintage paper pad also from Kanban.
  • I glued down just a little of the fretwork either side of where my topper was going. the outer floral frame was next to be added then my topper which I used Pinflair glue for so I could mould a more domed effect to it.
  • I rolled up my flowers from the spiral flowers number 1 from spell binders,  then painted them blue, drying them with a heat tool between layers then  added some pan pastel to the edges. I cut a few other flowers, one I added a butterfly to the other an iridescent stone to.
  • I used the heartfelt stamps to stamp the pattern on my sentiment and embossed it in white. very pretty.
  • A messy bow and a few more sparkly stones and swirls plus some sakura pen on the  roses for some sparkle and it was done...
Here are the flowers, you can see I cut into the fretwork to create leaf effects.
I love using Kanban as the quality is always great and uncoated cardstock means I can alter things just how i want to.
Anyway guys have a great tuesday and hope the weather stops this horrid rainging, soo miserable and was even foggy this a.m Typical british weather thats for sure.

Take care
Kim xx


Friday, 19 October 2012

Happy Anniversary..

Evening Guys!

Tonight I am sharing with you all a card I made for my friend Keithy's mum whose been with her hubby Nigel for 25 years and they were celebrating their Silver Wedding Anniversary. So Congratulations to them and a big thanks to Nigel for photographing it for me as he is a photographer so therefore I have a proper photo taken and didn't he do a good job, my work looks fab and so nice to see good shots of it. The lilac on the card was the same colour they had had their wedding all them years ago and Keithy asked me to make it with a stiletto of some kind on it as Mum still had the one they chose to have on the cake and I found I had this one in a kit I had from Hunkydory I believe so I was lucky I had it to match for them. So thanks again and thanks to Keith for setting up the picture session.
I made it also with Chloe stamps and sat and embossed and cut out every flower and added them all separately, I loved making it.
Have a great Friday
love
Kim x


Saturday, 13 October 2012

Lattice Bloom.

Hi All.. goodness what a long week.
I'm sorry I haven't been on here much AGAIN this week.
But I hope my card has made up for not being on. I really like how pretty this one came out.
I used my new spell binder dies along with some love Craftwork cards papers and Tim's inks as always.
I cut out my rose and leaves and inked and glittered them , so pretty and you can see some extra flowers made from Craftworks vintage pad with lots of lovely flowers.
This was my Sentiment which was on the Rubbernecker stand at Ally Paly on the day Sue Wilson from spellbinders was there too. I got a whole bag of sentiments etc for a fiver.. nice.
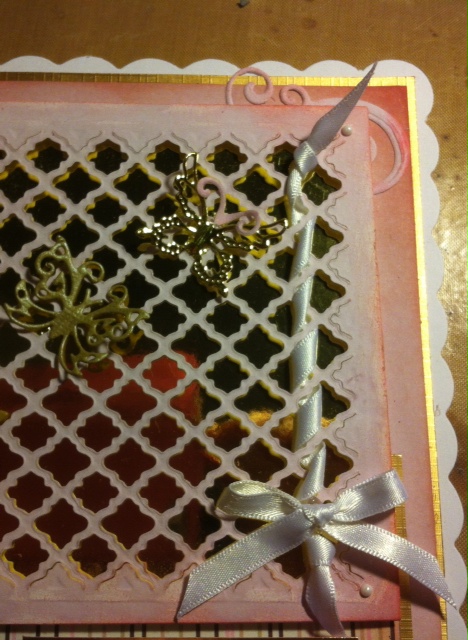
I did quite a bit of matting and layering for this one with a nice gold Mirri card. and the lattice was cut and mounted onto foam to raise it up a little too.
I weaved a little piece of ribbon through the lattice on the right added a bow nd 2 tiny butterflies I cut from my dies too. I sanded the edges of the lattice and rubbed in some ink too.
different but nice.
Hope you have a great Saturday folks and that it doesn't rain anymore.
Sorry it isn't a long post but i will be back tomorrow
love
Kim xx


Saturday, 6 October 2012

2 post Saturday.

Evening all, I have 2 cards for you tonight.

The first is very feminine, and the second is actually pretty masculine.

Hope your all having a good weekend so far, and I hope the folks at the Great North papercraft event up in Harrogate are having a great time, (I so wish I was there). I hope my cards got to Craftwork cards in time to be at the event too. Anyway we are having really rotten rain here in Hertfordshire so I hope you're faring better where you are.

Have a great Saturday evening, or what's left of it.

This is a bit of a hybrid haha, I used the spellbinders Pick of the day I got from create and craft, but I did it with Kanban card stock and used creative expressions ribbon and pins. The background is gorgeous; it is one of spellbinders new A4 embossing folders, yummy. The lovely sentiment is also from Kanban and was Dawn Wheeler's kits which were really pretty vintage kits that came out just a few months back and was very nice.

Next..
This one I started with the animal print paper and mounted it on black card stock. I cut out a background piece from white card and inked it with distress to match the back. I wrapped a ribbon around and added a small bow and a piece of Candi.

I cut out this very ornate small d-lite from spellbinders, which I mounted on black card again. I put the lattice onto mounting foam to raise it up fro the design and then I used some black enamel accents from Ranger and placed small dots in the cross of the lattice (took a while neck now killing lol). I
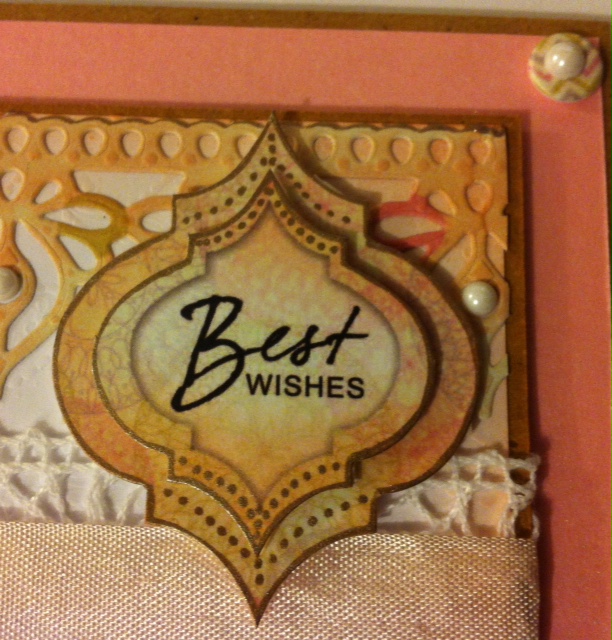
added my sentiment which I inked and added Best wishes to.

Very happy with that.. I can do a man's card woo hoo...
See you tomorrow guys!
Kim x

Wednesday, 3 October 2012

Gnpe xmas card.

Good Evening Folks
Well tonight I was coming home from doing a couple of hair cuts..(past life) lol
Another form of art hey.
Well it dawned on me how cold windy and rainy it was and that's when it hit.. winter is clawing at our heels again.. errrkkk. I don't like the cold at all, it makes me miserable but at least we put on heating and cuddle up and craft, some don't have that so no more feeling sorry just get on with the craft I say... My daughter has a good way to get hot though as I lay up here cuddled up and getting warm she is downstairs leaping around getting fit to Shaun T and his Insanity workout programme. It's quite soothing listening to the rhythmic sounds of her feet pounding on the floor over and over and over.. hmmm maybe not but it works she is very fit and tiny.
Anyway enough of my ramblings... Still using my lovely Bohemian kit from Craftwork cards I challenged myself to make a xmas card .
The sparkly paper is so pretty I knew I could and I already had their sentiments in the little round disks so off I went.
  • I used a card blank I got from QVC the other week which had baubles hanging on the sides so using that as inspiration I cut a piece of black card in half and made sure they were the same.
  • Then chose a piece of paper and cut the parts I wanted from it to mat on to the black pieces.
  • I took a strip of paper and punched the edge making it decorative. Then punched some large circles and some slivers of black card.
  • It was just a case of mounting it on foam and matting and layering the baubles with the sentiment circles on the front of the card, using the black slivers as chain replacements for the baubles and adding lots of Candi in strategic places.
  • On the inside I matted again the same paper on black and added another couple of baubles with the sentiment sayings for Xmas and then noticed on the left hand side I managed to pick up a bit of ink on my nice white card... arrrggg oh nooooo , don't you just hate that so I punched out a strip to match the front and added that to left side and then punched small bauble shapes and added the black slivers as little chain type hangers for the balls.
  • I added my name stamp to the back as always to finish off.
I'm happy with the result I know we all love a good traditional Xmas card with Santa and Rudolf etc but I think there is also a place for some classy and elegant designs too and the paper from this pad definitely fits the bill.
I posted all my samples up to the girls at Craftwork cards today so they will have them for the show at the weekend, I really wish I  was going with them but I wish them all a really happy and fab time at the show and hope it is really productive too.
Have a good one Girls.
Have a great Thursday all.
Kim xx


Saturday, 29 September 2012

Pick of the Bunch

I was asked by the lovely Julie Hickey from Craftwork cards if I could make some cards for the great Northern paper craft Extravaganza coming up soon. She gave me a gorgeous pad of paper and frames and new candi so I could have some inspiration as I worked; it was all from the new bohemian range which is glittery goodness and very lovely... Tonight I sat and made two cards which turned out really well with lots of embossing, over stamping and inking/blending which I love.

I have broken it down into a few pics so you get to have a proper look at the embellishments which are in the paper pad which I have inked and curled and moulded, added Versamark and embossing powder, heated, then added mica powder and heated again which allows the mica to sink into the enamel and so becomes permanent, so no rubbing off with handling.

It took a fair while to complete, even though it looks simple because the glittered paper is so beautiful. Julie is also going to ask her friend Nikki up at Leeds to photograph these cards to add to the  craftwork cards blog which is great. Thanks again Julie, such a lovely lady!

  • I took an 8x8 card base and added some pink card, I used some American craft card in valentine colours. I trimmed my sheet of paper from the Bohemian pad and Layered it on to the pink mat. I punched a thin strip of paper and added to the left hand side.
  • I took one of the frames and added some colour to it and some spray glitter to give it a lift. Then I added some rock candy paint all over and dried with a heat tool til it was all cracked but sparkly. I decided it wasn't dark enough so I rubbed more ink into the cracks, I love the effect here! After adding the little sentiment on top of the frame here, this section was complete. I have to say in this picture (because the lighting is rubbish) the frame looks orange, but it is in fact pink and distressed a little.
  • I moved on to the tag next.
  • The tag came in my Bohemian goody bag I received from QVC the shopping channel, and it matches the free pad from Julie so i inked it with my Distress Inks and then covered it in Versamark and embossing powder and heated, I will never tire of the change as it transforms... I did the process again to make it really smooth and shiny. I added my ribbon through the tag also and a small piece of the thin punched loopy paper to add to the tag.
  • I popped out lots of flowers from the pad and curled them, inked them and to some I added bling, some candi, and some I curled some tiny swirls for the centre of flowers.
  • My insert was the same design paper without the glitter all over, so it could be written on. I took the piece of paper that the flowers were attached in and used it as a mask with my Pan pastels. I stamped the amazing Clarity stamps sentiment onto it. 
  • Lastly I had a skeleton leaf, not everyones fave but I added versamark and embossing powder to it, melted it in and did the Mica technique again. I added it to the upper right corner with a flower. Some of the flowers I used I also enamelled as you can see in the last pic. You can see just how much beautiful glitter is on this paper in this one too.
Well it is now gone 2 a.m... I'm sure my son is still partying from his birthday and rightly so! lol But I have to hit the sack as back to work in the morning.

Night bloggers, and I hope you like my card, If you go to the GNPE then I wonder if you will see my card there... Let me know! I have my very own stamp which Clarity stamps made and I love it, I have never had  Polymer stamps so good as Barbara Greys.
So look out for my stamp if you go to the Craftwork cards stand.. I really wish I was going, I truly would go to every show if I could, and be part of it all.  Big sigh lol.

Have a great weekend and look out also for lots of new posts.
Kim xxxx

Thursday, 20 September 2012

Flutterby Roses.

Good Morning All!

Here is a card made with a very recent kit I got from Kanban. I was playing around and found the lacy rose effect ribbon so I decided on an Easel card. Dawn Wheeler designed the kit and it is beautiful; she did a great job, such a romantic girly feel to it this one. So I had a play and went totally OTT with it, but some how it works.

I love the backing rose card matted on to black, the photo I'm afraid isn't great as it's silly o'clock and the lighting is pretty poor.

I have embossed butterflies with pearls on their backs, rafia ribbon and spiders web material tied up into bows too.

Simple and elegent but lots of elements that took a little while to secure. Tomorrow in the day light I will re-photo and hopefully that will be better!

Crafty hugs,
Kim                                                                                                                                                                                                                                                                                                                                                                                                                                                                                                                                                                                                                                                                                                                                                                                                                                                                                                                                                                                                                                                                                                                                                                                                                                                                                                                                                                                                                                                                                                                                                                                                                                                                                                                                      

Monday, 10 September 2012

The colour of Purpleness.

So, Monday again already, although a few hours before work yet... My temperature a little more settled, I thought I would make up for the lack of posts last Friday/Saturday with an extra one!

This card is another that was featured proudly (look at it puffing out its chest) in this month's Create and Craft magazine.

It is a complex little character although not instantly recognisably so... oh dear, you would think I was discussing some fine wines... No, but a fine card it is! I have another picture and you may see from it why it is more complicated than first thought:


That's right, it is partly acetate. Therefore, me being slightly OCD about details and covering up workings and bits, find it slightly more challenging to make an acetate card as I can't possibly have white showing in the centre unless it is the part left to write on. Therefore I used a lot of dusty concord in this one and lots of backing paper too.
  • I started by taking a Dawn Bibby stamp and stamping her flower image and leaves all over a piece of A5 card. I stamped a few extra onto a scrap piece and cut them all out and inked them, I took the smaller size and stamped another three and cut and inked them too. I curled the edges glued them and left them aside.
  • Then I inked the stamped page and using a water brush took some extra ink and coloured in the edge of the flowers and some leaves too. I attached my acetate to the A5 card and took some purple Papermania Capsule collection paper edged the side and covered the working edge of the card too. 
  • I measured a smaller piece of card for the front middle panel and inked it a lot, I then stamped on my same flowers and coloured them as before, then took the flowers I had made and curled and attached them to the newly stamped ones and found something pretty for the middles. I had cut a pretty wavy edge on this card which was of course the unpearlised side of centura pearl, Anyone who knows me knows I love to use the back of this to stamp and the ink blends so perfectly on this too.
  • I used four sparkly Brads to attach this to the front of the acetate card. Then I needed to cover this on the inside, so I took a matching piece of paper and covered the inside. I stamped out the sentiment, and inked the edges to match and attached this too.
  • My ribbon was an ivory/cream colour so I inked this too and dried it carefully as I didn't want it to wrinkle or burn. I wrapped my card with it and added sparkly pins to the knot. I matted and layered sentiment for the front of the card and the cover on the back was my last touches.
It was featured on page 20 right at the top which was very nice and I hope it will be the first of many. Have a great Monday, don't forget to come back, feel free to comment and chat or ask to see anything, I will always help.
Kim x


Sunday, 9 September 2012

Happy Christmas Bauble

  • A small xmas card today too. I was sitting chatting and playing with a piece of silver shiny card and stamped out 2 circles, that was it... I immediately saw baubles so...
  • I took a piece of card and embossed it and added some forest moss Distress Ink to the edges and also some bundled sage. 
  • I took a couple of ribbons and wrapped it around the embossed card. 
  • Laying out my Baubles where I wanted them to sit I placed my sentiment where I wanted it to go and Drew in black pen a chain for each Bauble.
  • I raised each Bauble on foam to stand them away from the card. and stuck them down, the same with the sentiment.
  • I added jewels to the disks to make them sparkle and used tones similar to the inking. 
  • then I mounted the card onto the base card which had Baubles foiled onto the sides in silver which is very pretty.
  • The last thing was to tie a bow for the left hand chain on the Bauble and add more jewels to the edges and it was finished. 
All this from sitting holding a piece of shiny card... It was a very quick card to do but I'm sure someone will be happy to receive it for Christmas time. 

Wednesday, 5 September 2012

Pink Roses

Hi all.
Hope everyone is having a good start to their week. Wednesday has just started with it being 12.53a.m here. Before I go off to sleep I thought I would add a little card here for you all to view. I really would be very happy to read your comments if anyone would like to do so. I also will be sending out a card to the first person who does leave a little comment as previously mentioned, that person will also get a shout out on my blog and other social media sites.

Now to the pretty card, as you can see it was a quick creation though very pretty.

  • I started with a Kraft card base 8x8, stamped a sentiment inside and my logo on the back.
  • I took my pink vintage paper and inked edges and corners with Tim's Tattered Rose and a little Victorian Velvet. I do this for two reasons, the first to blend the edges to give it a much softer look so the focus changes as you view the card. Secondly, this way you don't have stark white edges therefore a more professional finish. I added a ribbon and a sentiment wrap from craftwork cards and attached the whole thing to the card base.
  • I took a core candi mat form Kanban and instead of ripping the edges to expose the coloured core in the card, I put some thick foam on to the back right against the edge and added some glue around its edges.
  • I then folded back the scored pieces as I said instead of ripping them off, this makes a little platform raised up for a topper or flowers or anything really, In this case though I'm using a Kanban rose topper, which is stunning and speaks for itself, needing hardly any embellishment.
  • I added the topper and a bow and also two coloured pins in the top of the topper but pushed into the foam under the platform. I was happy with its simplicity, it's an elegant card.

Have a great Wednesday guys and come back tonight for a new post featuring a dartboard, a number and a bottle of champagne. It was a fun and different commission with lots of elements.
Kim x