Showing posts with label bling. Show all posts

Wednesday, 7 August 2013

Heartfelt Dt Card + Christmas Launch Sneaky peak.

Hi All

     Over on Heartfelt Creations blog today You can see lots of Inspiration from all the team including my creation for this week which I have added here from the Burst of splendor paper pad and the classic leaf die, some cuts with spellbinders and a simple spiral flower and gems and look how pretty and all because of the gorgeous and very sturdy paper collection.


I was flying around making a card, doing washing,posting DT items, tidying up and packing to come to the coast and see my son so this one isn't as detailed as my usual cards but still as pretty I think. 
 Turned slightly so you can see how I have cut out the flowers and decoupaged them to create dimension .
 I cut out using the fabulous leaf die 2 sets of leaves and added that to the card and then made a flower by hand cutting a simple spiral from the gorgeous paper and then adding glue and dipping in iridescent glitter.
Here is a close up so you can see the spiral, so quick and easy to do and any scraps of paper left over no matter how small can be made into tiny versions of this and added to corners with other groupings of flowers etc. The paper is such amazing quality that it near enough holds its shape without any glue or fuss at all but of course I used a wet glue so it stayed permanently.

Next of course I gave you a sneak of some of the Christmas collection on the last blog post and today over at Heartfelt you will see a sneaky peak of the collection too. Here is the picture and what our lovely creative director had to say about it below.


Sneak Peek of the Christmas Card Collection 
"The Christmas Card Collection will debut on August 14th. The Christmas Card paper pad has 76 card fronts that will enable you to create quick and easy Christmas cards that are embellished or simple- you pick! This paper pack is a fantastic solution for getting the most beautiful cards for the least amount of time. If you don’t need one side, flip it over and use the other side! The colouring is done for you. There are many panels for utmost variety and the best selection. The stamps and dies released with this collection are absolutely festive and ornamental. The gorgeous type and frames will help you create the most beautiful Christmas project your friends have ever seen! "

From Emma Lou Beechy.

So what do you think? be sure and check over on the blog as it gives step by step instructions on all of the inspirational cards and layouts etc. You can print them out and do your own version of the ones you love. Be sure and leave me a comment either here or on the heartfelt blog as feedback is always amazing and I would like to Thank all the lovely ladies who always leave me comments, it is always humbling when someone says they enjoy the hard work you put in and so A huge thank you to you all.
Love 

Kim
xxxx

Saturday, 3 August 2013

Lots to show today....

Good Morning Bloglanders.

Hope you are all having a crafty day and enjoying the nice weather in the UK unusually (If you are here) . I spent most of yesterday driving to the coast for a much needed little break so here I am house sitting for a wonderful lady who I am proud to say is my friend and feeding her kitty and fishes while shes off to Egypt which means I get to spend time with my son who lives here while studying.

I wanted to share some Pics of recent posts etc. So here is Last weeks card I made for Heartfelt Creations.
I just love the colours in this Months Burst of splendor collection and played them up with the matching ribbon and coloured the leafy frame to match. added lace which is always instant prettiness and even the matching dazzler on the bow works in with the theme.

Here is a close up of the Glitter I used on the flower which is a Martha Stewart one fire opal I believe.
Next I want to show you the 3 little projects I made for Craftwork cards , I just love their Time flies collection which is so totally up my street and I wanted a selection of different goodies so here we are.
I made an Easel card a card using their new flower shaped base cards and A small box of mini cards.

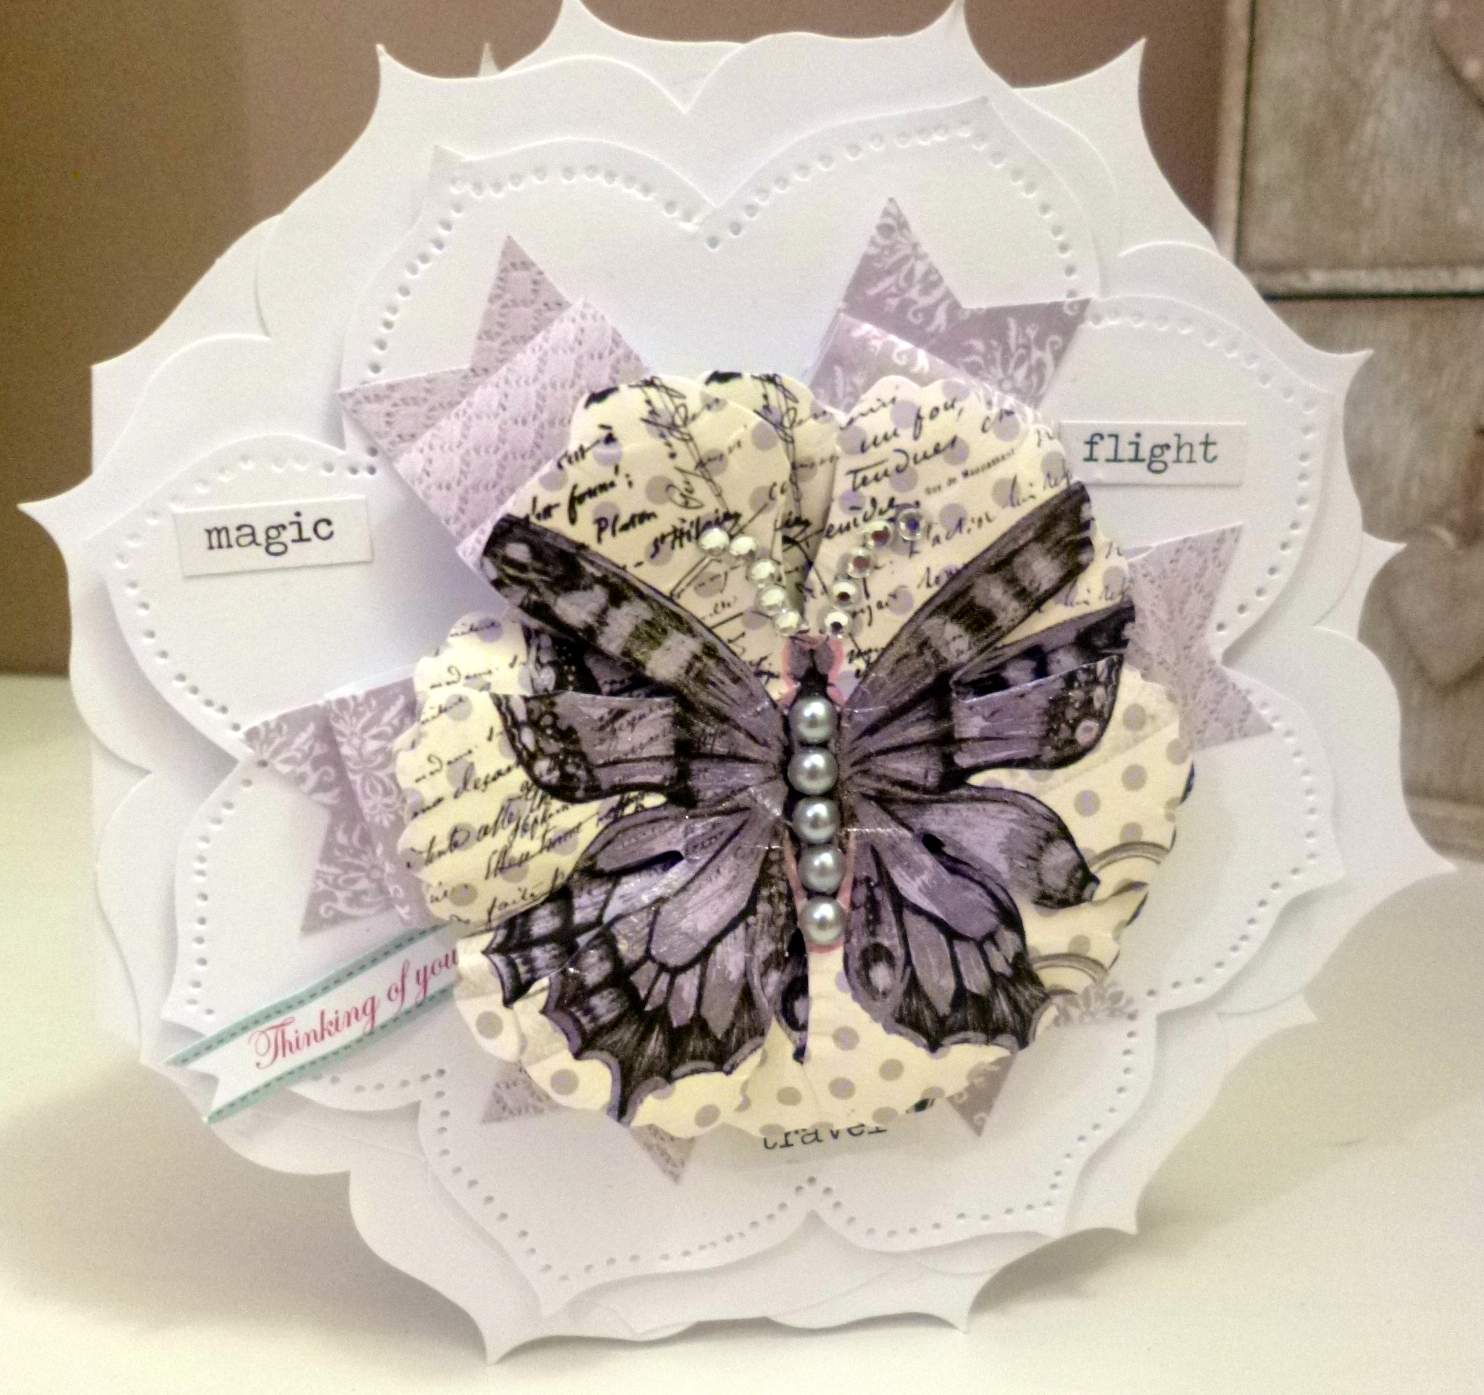
 Here is the Easel card , you can also see the new bows made from paper from pads of them in the online store here.
You can also see the bows under the butterfly on the flower along with a mat I hand cut and pierced the edges too.


Above is a close up of My Thanks box with 6 small Thank yous in it. I enjoyed making all the projects for Both teams as always and would love to know your thoughts on both.

Next week the new Christmas launch goodies will be on Heartfelt creations US website with the competition to win the entire collection for everyone so be sure and leave a comment on the collection to win, It is gorgeous.

 The collection was on Create and craft last week as their Las Vegas CHA event was on. Here is a picture (all be it blurry as it was a screen shot) of the collection with The creative director Emma Lou Beechy and on the blue and white card left on the desk is mine which I will be showing in detail with the launch next week. Also the last picture is of the presenter Andy holding another of my cards too.
 Emma Lou and Andy
Stunning isn't it... Don't forget to pop over and comment, you have to enter to try to win...
So I squeezed in a lot today and I hope you enjoyed looking at my projects. See you soon with more goodies and I am now off to sea the sea yay...

Have a great Saturday everyone

Love 

Kim 
xxxxx

Tuesday, 23 July 2013

Mini books !

Hi all well today I have a mini book fest for you all...

I Have 2 mini books very different in appearance but both as lovely I think. Hope you enjoy them.
So how are you enjoying the weather here in old blighty? well would you believe it could even be these temperatures after so many rubbish summers ? Today in places were 34 and in my office it was up to 35 at one point... tooo hot I cry, then almost immediately I get an instantaneous spasm of what can only be called.... GUILT.

           So this is using the fabulous Time flies collection from Craftwork cards.
This is all about butterflies and clocks , cogs , beautiful text etc. A stunning quality collection

Next I have 
Heartfelt Creations
As you can see, a totally different book made from stunning Heartfelt Creations Burst of spendor collection.
I love the romance of this  but which do you prefer?
So what have you all been crafting this week?
 Next month is rumbling ever closer and there are 2 shows  I like to go to, one is Stamperama at Stevenage and the other is the Big stamp and Scrapbook show at Alexandra Palace , I get to see thousands of goodies, all my lovely team mates and get out and about in the crafty world and this makes me very happy haha, so If you are in the UK and can pop down please do.

So for now please leave me a comment and let me know which of these mini books floats your boat and gets your vote.

Love 

Kim
xxxxx

Wednesday, 3 October 2012

Best of Everything.

Well it's almost 4a.m UK time. And it's chilly.. I woke and couldn't sleep although thankfully the headache I seemed to have all day yesterday has gone yayyyy.
I managed to finish off all my samples yesterday for the GNPE stand for Craftwork Cards.
Here is one of them, A pretty little number if I do say so myself.
  • I die-cut a shape that I could ink and stamp a sentiment on first , then took a frame from the pack that would fit behind it. I inked very lightly a doilie to sit behind the frames.
  • I took my lattice punch to the purple piece of card that was in the Bohemian kit, then cut it in half.
  • I love to make flowers so I made several all different from the pack but also just from laying down some glue and sticking the Candi into it with a dded bling. Flowers need leaves so I stamped some and cut them out.
  • I cut a couple of mats and layers. 
  • Next I assembled the whole thing together above , firstly laying out all the pieces before gluing to make sure it sat well together. it is good to have a plan before you start so you know where you will end up on your project.
  • lastly I tied a double bow and after gluing into place added a piece of Candi and all the leaves I squeezed under flowers to finish.
Well. I hope everyone likes it I know I certainly enjoyed making it, definitely a fab kit to get. I have to post them up to Leeds tomorrow for the guys to take pics and put them on the stand over the weekend. Have a good Wednesday guys.

Kim xxx

Sunday, 30 September 2012

LACE..


Evening bloggers... How was your Saturday? Mine started off blaaa with work first thing in the cold after being in a lovely warm cosy bed but it was only three hours so shouldn't complain, the hospital I work in is closing too so we're not sure how long we will even be there so... Anyway enough of that! I made a card I really like today, I'm absolutely loving this Craftwork cards collection, it's the Bohemian and the pad is soooo glitzy and the papers with no glitter are sooo perfect for making it a bit grunge but pretty so here is my stepper card made as tribute to Bohemia with added lace.

  • I started with cutting the pad down a bit because I wanted one of the papers with just the chandelier showing. 
  • I then got the matching stamp also from the same collection and over stamped in black, I inked all the edges with my trusty Distress, Then thought this looks a little flat so i went back over with an embossing pen picking out the chandelier and poured on clear enamel and heat set, all this was then matted onto black card for drama.
  • That was much better, I cut out an extra section from the top of the pad and trimmed along the lace design, Matting it on to black. While I was doing that I cut the top of some lace and added that to the small piece of card as I was matting it.
  • That was it, all the Lace ideas started jumping in my head then, so i cut out the pieces for the back sections, inked and matted them to match adding the lace as I went.
  • I had the stamps for the lettering so I stamped LACE and added clear embossing in 2 layers then swiped over with mica for little shine and heat again. I made lots of flowers in the corresponding colour from the pad and attached them with little pieces of lace and then went over with some bling for the chandelier and some lace Craftwork Candi, my little sentiment was last and tucked in their nicely with another inside the card matted on paper from the pad we were done.
I really really love this font and also the craftwork letters that you get in some of their kits too. And I like to matt them onto card and add them at differing heights like on the cards I used for the Stamp addicts samples.

Here's the closer picture of the flowers that are really pretty I think.
Have a great Sunday and will add more tomorrow. Sleep well everyone!
Kim xxx
                                                                                     

Saturday, 29 September 2012

Andy Mega Day

Dear Bloggers,
Firstly, I have to apologise for neglecting you this week, I have been a very bad Blogger and not had a lot of time for you. I hope to rectify that this week as after tomorrow I have the week off of my day job and I have a few deadlines to catch up on. So, plan to see alot of new cards!

It was my lad's birthday on the 28th, and I sent him a little card for his special day, he is now 24.

I used The Kanban So Macho kit as it had a Binary code background card which I thought was cool and I made the flowers from it too. I just love Kanban. I hope he knows how very proud of him I am.
ahhhhhhh I know and one week til I see him yay!

Friday, 21 September 2012

Kanban New Card..

Hi All!

Laying in bed at 11.48 pm, so posting today's card from here. I was so exited my new Kanban kit arrived today, yay! So I thought I would dip in with a really feminine little number. I really enjoyed working with it and love the new lighter weight cardstock, but I loved the other card anyway. Kanban use mostly uncoated card so you can carry on and ink over the top and I do that a lot.

I searched my stash and couldn't find a flower that I liked to match this one so I made one using some flat paper flowers and I inked it and spritzed it with Cosmic shimmer sprays, which I love with all that sparkly Mica. Ta da! The flower:

  • I chose my topper and background card to start... Then used weathered wood Distress and inked the edges and corners really well. I have a small flourish polymer stamp and I over-stamped the corners and all around the page.
  • Matting this onto the Kraft cardstock I chose to use this horizontally, not vertically for this one, you can just see the lines in the picture but it feels fab.
  • I added the border across the middle of the card. Then matted and layered some kraft again onto some black card.with a lattice punched peice of paper from Craftwork cards.
  • Then I used some foam pads to raise this mat away from the card a little. Adding my topper of the wonderful Roses, I went round the petals with a sakura stardust pen and made them twinkle a little. I got carried away and added it to every swirl I had over stamped onto the blue cardstock too.
  • I made my bow from three lengths of American seam binding, which is amazing. Using the spritzer spray I added a little to the edges and scrunched it a little. Adding it to the corner I covered the centre with a matching sparkly button with a blue Aurora Borealis coating. I added some bling and a sentiment.
  • I matted and layered a sentiment inside too and made a matching box.
I added the picture of it to Facebook and Dawn Wheeler commented and said it was fantastic and so pretty! Shes so lovely and works of course for Kanban so I'm glad she enjoyed seeing my card.

I don't know if anyone saw QVC tonight but I enjoyed an hour of Craftwork cards with the Lovely Julie Hinkly, I got lots of inspiration. I just love their products, as you see from this blog I use their
crafty goods all the time.

Anyways, happy Friday folks, I'm working a half day tomorrow so I'm looking forward to that.
Kim xx


Saturday, 15 September 2012

Owl be seeing you..

So today's little treasure is 6x6 and the topper is from a kit which I think is Kanban but I have had it a long time, I dip in an out of it but this was quite a cute one I thought.
It utilises a flower I made up from Hunkydory.
  • Firstly I inked the backing card a little in purples and green then added some purple ribbon strips.
  • Then the card choice for this layer was retro flowers. For some reason it didn't clash like some would with all the patterns. Atop of that I added a green strip of paper to the left.
  • After inking the topper and adding some cabochon stones to the eyes to make them sparkle, I mounted it on foam and matted onto the card just covering the top of the green paper. 
  • I added my flower to the left, which I made by curling the edges around my pokey tool for each layer, and adding sparkle to the centre.
  • The bow and sentiment, and a little bling in the corner finished it off. Although I did go back and add a little faux stitching in black around the edge which makes it look like it's been paper pierced on the edges.
Have a great Saturday Crafty bloggers! I have a project to finish of 30 small thank you cards for a very special young lady. And also My girl is going to a fancy dress event tonight so we are off shopping for the outfit. I think I will end up doing more stitching. Haha!

What are you doing?
Kim
X

Wednesday, 12 September 2012

Tv cards for Stamp Addicts 13/09/12

Hello all!

Here are the cards I made for Stamp Addicts over this last week. They are on Create and Craft TV tomorrow at either 4 or 6, I'm not sure which, but the stamps were lovely to work with and easy to build a picture with. It was good fun, as they are a different g,enre for me.

This was Coloured with distress inks and covered in rock candy, then rubbed with black soot to give it a smoky, shadowy atmosphere, like on a stage! I found a great pack of papers that I had stashed away for the skin type background too.

The letters were Craftwork Cards mounted onto black card, some raised, and some flat. I took some little wooden stars and pressed them into Versamark, and then tipped on lots of embossing powders mixed with a little utee and glitter, melting it on and adding them to the topper I made.

Lastly, took a couple of musical peel offs and added them to some mats and layers and found a way to attach them.

Next...

This is a bat playing a guitar, so I thought I would colour him in greys. For this, I tried Promarkers this time. I managed to get a good blend and used Greys mixed between cool and ice.

This is a stepper card with the big guitar in the back cut from a rock paper pad I had, fab quality, more like card. I coloured the guitar in mixes of orange/red and dark red. Then I added glossy accents to that and his sunglasses, they dried really shiny and raised.

I used another backing paper with lots of silver guitars on the back and the bit left over. I cut a guitar out and mounted it like real guitars on walls. Made some flowers using petal pairs punches and glitter and glue in the middles. Finally added bling and done!

Next..

I love this one and when I stamped it I thought I'd make a background card using just the head, but I didn't realise I had a bit of ink on the word part and it stamped Vini on the right! So the turtle after that had a name (unless the Stamp addict ladies already gave him one). To me, he is Vini the turtle!

Again I used some fab papers that really do look and feel like reptile type skin. Two of those flowers I made a while back from paper made it onto this one.  I used also some Debbie Moore backing paper from her vintage travel pack  punching out some extra paper in strips and adding them for dimension.

I coloured old Vini with Sakura pens mostly but there is some distress inks in the mix too as I couldn't always get the right colour for him with just Sakura.

I used the technique of putting fresh water over the eyes of the stamped head background and blotting it back off so it goes back to the original white of the stamping card to stand out.

A little white pen faux stitching and bling, and a bow, and also some raffia helps to finish this one off.

I also did...

The lion.

I mostly coloured him by dobbing my inks onto my craft sheet and using a water brush to wash the colour onto the card. I built up layers of colour allowing a little drying time. I used a craft cd of Joanna Sheen's to print the grassy background. And lots of matting and layering.

Due to The wizard of Oz, when I think of lions, I always think of the cowardly lion needing his courage. So I decided this would be a good luck/courage card. I drew a paw and layered that too and again used the Craftwork Cards letters and matted them on black, added bling on some not others.

I also tried him a different way...

I used some Papermania papers on this one. An Easel card which I thought I'd have some fun with so I added a background and over stamped some branches I gave him a daisy chain necklace and drew a golf ball in. I had him standing on a stump of grass and more daisies and then used a sentiment I had saying:

"Take the time to walk barefoot in the grass making daisy chains and Believe in the beauty of your dreams." From Indigo Blu who I absolutely love.

I used it like a sign post and enamelled a piece of card that I had made look like wood.
Lastly, I made some flowers again with punches, layering them up so as to make them look like little but full blooms. Bling finished him off... not literally.

So these were the cards I sent and I'm looking forward to seeing the shows tomorrow.
I thank Sarah for choosing me to help her showcase her lovely stamps. 

Hope you like them!
Happy Crafting
Kim xx


Monday, 10 September 2012

The colour of Purpleness.

So, Monday again already, although a few hours before work yet... My temperature a little more settled, I thought I would make up for the lack of posts last Friday/Saturday with an extra one!

This card is another that was featured proudly (look at it puffing out its chest) in this month's Create and Craft magazine.

It is a complex little character although not instantly recognisably so... oh dear, you would think I was discussing some fine wines... No, but a fine card it is! I have another picture and you may see from it why it is more complicated than first thought:


That's right, it is partly acetate. Therefore, me being slightly OCD about details and covering up workings and bits, find it slightly more challenging to make an acetate card as I can't possibly have white showing in the centre unless it is the part left to write on. Therefore I used a lot of dusty concord in this one and lots of backing paper too.
  • I started by taking a Dawn Bibby stamp and stamping her flower image and leaves all over a piece of A5 card. I stamped a few extra onto a scrap piece and cut them all out and inked them, I took the smaller size and stamped another three and cut and inked them too. I curled the edges glued them and left them aside.
  • Then I inked the stamped page and using a water brush took some extra ink and coloured in the edge of the flowers and some leaves too. I attached my acetate to the A5 card and took some purple Papermania Capsule collection paper edged the side and covered the working edge of the card too. 
  • I measured a smaller piece of card for the front middle panel and inked it a lot, I then stamped on my same flowers and coloured them as before, then took the flowers I had made and curled and attached them to the newly stamped ones and found something pretty for the middles. I had cut a pretty wavy edge on this card which was of course the unpearlised side of centura pearl, Anyone who knows me knows I love to use the back of this to stamp and the ink blends so perfectly on this too.
  • I used four sparkly Brads to attach this to the front of the acetate card. Then I needed to cover this on the inside, so I took a matching piece of paper and covered the inside. I stamped out the sentiment, and inked the edges to match and attached this too.
  • My ribbon was an ivory/cream colour so I inked this too and dried it carefully as I didn't want it to wrinkle or burn. I wrapped my card with it and added sparkly pins to the knot. I matted and layered sentiment for the front of the card and the cover on the back was my last touches.
It was featured on page 20 right at the top which was very nice and I hope it will be the first of many. Have a great Monday, don't forget to come back, feel free to comment and chat or ask to see anything, I will always help.
Kim x


Sunday, 2 September 2012

Hunkydory kit

This is yet another of the cards I made using the free kit from Hunkydory from the Donington Show, I have stretched it by adding mirri board,cardstock and card blanks. It seems to be going on an on!

I'm enjoying using it and purposely haven't added any card from Hunkydory's other christmas kits to see how far this lovely gift stretched and it is doing very well. I think I could get another 3 cards still from it.  Wow! Thanks Hunkydory.