Showing posts with label ink splats. Show all posts

Wednesday, 22 April 2015

Visible Image Wednesday

Hi Folks

I hope you are all enjoying your week and that you are getting some nice sunshine , it has been so very nice to get out of work at night and still see the sun streaming through the trees.
After last weeks quite complicated tutorial I thought this week I would do something a little simpler for folks in the clean and simple vane.
I used three stamps from Our Visible Image Friends and they will of course be listed below or if you have any similar or you would like to substitute one of your favourite quotes or sentiments it is just another way of doing a very quick but smart card to give to someone special.  It is funny isn't it , when we make cards/ gifts we all seem to put our heart and soul and a bit of ourselves into the design and the way we compose it for that person , I feel like I am making it for all of you when I do them as I share the details so much with you all.

Here is today's card and I hope you like it.


 I used two distress inks on this one in Vintage photo and Seedless Preserves. I used off white and black cardstock. Lots of matting and layering with foam in between too.


 Firstly,  I took some off white card and my Grunge polka dots background stamp with Vintage Photo DI and stamped a few dots on opposite corners and then took a piece of cut and dry and a little ink with a light hand and added to all the edges and corners of this piece


 I then took my Ink Splat stamps and used a few different ones with the purple Seedless preserves DI
and stamped that randomly , I did keep in mind the sentiment would be around the centre and it would be good to still see some of the inking once attacked to the card etc. I then matted this onto another piece of off white and another larger mat again in off white and then a black layer.
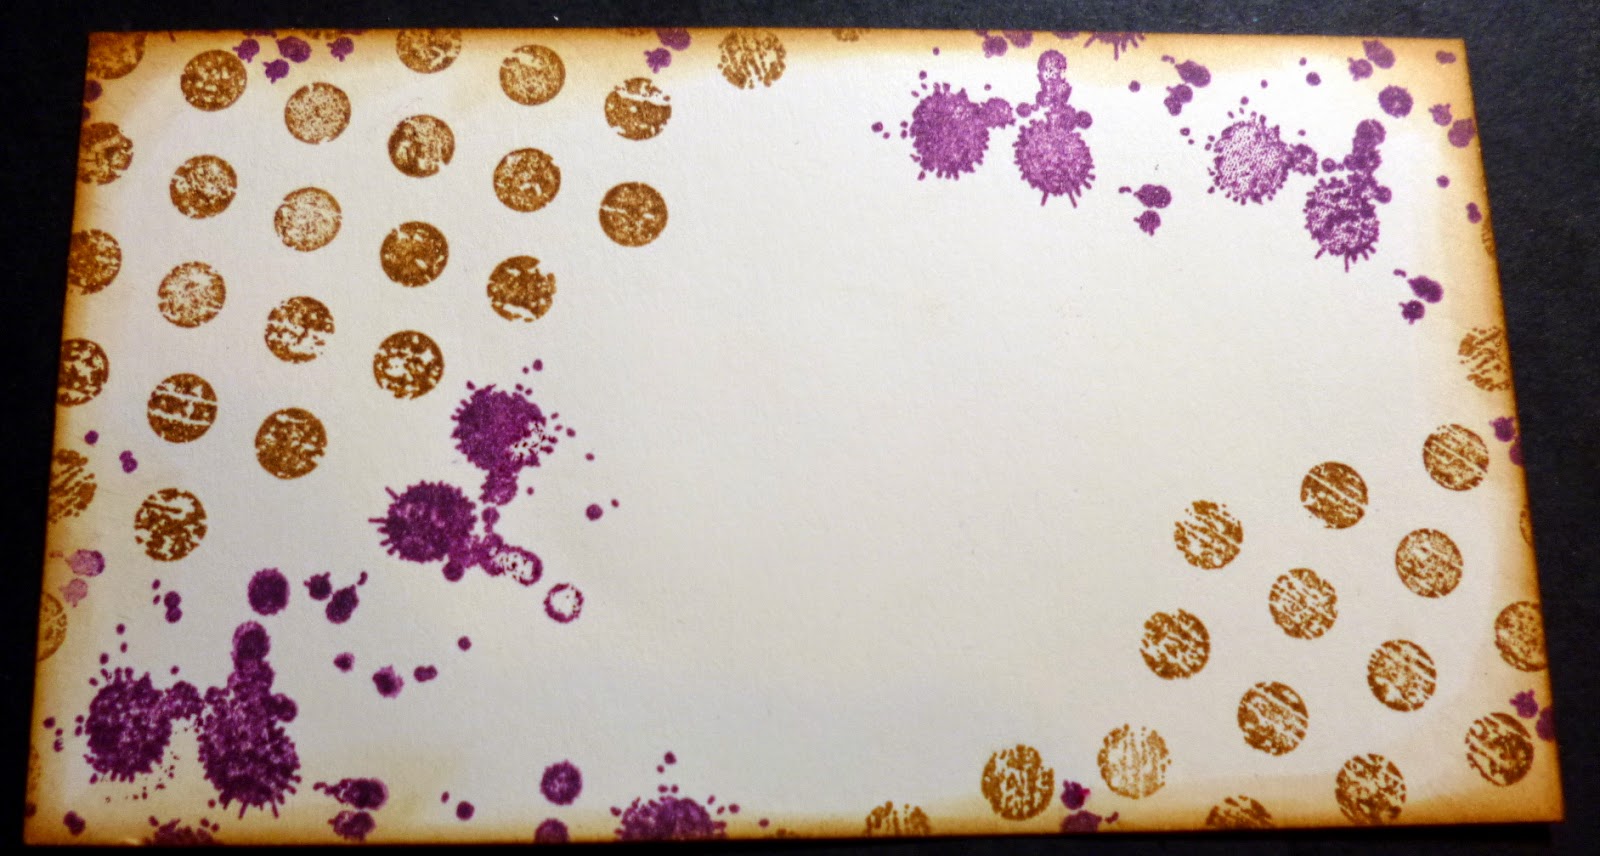
 Here you can see the above mat and layers and how it is starting to sit together already.


I took a left over piece of the off white card and stamped my Just making memories sentiment which I adore in Versafine black ink and added one of the purple large splats to it, I used some of the Vintage Photo to edge this piece as before and then mounted it onto black card.

 Here are two more photos of the card up til now just as I am choosing which way I will go for this one with embellishments. Sometimes I love to match lots of accessories to the card and other times I just want to leave it clean and speak straight to the point and I believe this is in the later category this time.


 I added a couple of small sparkly stones to the corners and a twine in matching purple bow with a sparkly and pearl stone to cover the knot and another of the same sparkle with pearl in the centre to the large splat on the sentiment.
I also decided on one more layer of the off white and black layers to finish off and give the card some real height and dimension after all clean and simple doesn't mean boring and bendy does it folks hehehe.

Ok so the stamps I used from my good friends at Visible Image are listed here.


                                                                    Grunge Polka dots.

                                                                 Just making memories.

So you can see how simple it all came together once it is broken down can't you? Perhaps you can tell me whether you like the mix of tutorials I do each week or if there is a particular type you like best, maybe paper pads or inky ones , maybe the embossing techniques or paints and colour etc, let me know in the comments if you would like too.

Here again is the finished Image 

I wish the camera picked up the vibrancy of the cards made but it really does not pick up how fresh and bright  a card is or the sparkle we like to add  sometimes it just does not matter how many pictures you take it just does not translate so well to the computer.

However I hope you enjoyed this tutorial, thank you for stopping by and looking through, don't forget to subscribe If you haven't already and I will see you tomorrow with some more fun with art and craft work.

Love and hugs to all the lovely folks.

Kim 
XXXX


Sunday, 6 July 2014

Visible Image Sunday

Hello my lovely blogglies.

Hope you are all having a fantastic weekend and the weather is nice and warm where you are still, we had a little rain yesterday but it wasn't too bad,it didn't cool it off a lot though which is nice.

Thank you for all your lovely comments this week, I have had a little creating session for today and this card is a bit different for me I think but I wondered if I could create what looked like backing paper with my Visible Image stamps today and yet still manage a little layering with the embossing powders and stamps.

I want to send my love and thoughts to all my lovely ladies who have friends who are ill or have lost people this week , I am thinking of you all and them and I hope the long days ahead will bring some relief into their lives with time. I do understand their pain and I know how desperate they will be feeling right now. My heart is with you guys Mwah xxx

Here is today's little card which  I made into kind of a tag card with room for little gifts or vouchers etc, see what you think.

I took two 5x7inch cards and attached them together in the back , then I trimmed half of each front side into the triangle shapes you see here. I then took my Polka dot Background and stamped all over both sides matching up the pattern as I went, I used Versamark and embossing powder in clear so the white of the cards would show through while I inked the card front.

These are the two colours I used to Ink the card at this stage and I used a cloth to buff the polka dots so they were free from ink after, nice and white.

 I am not sure if you can see well in this one but I used my Ink splats stamps to also create some tone on tone layering in the background too with the same distress inks. I also used my Grunge flourish stamp with versamark and bronze embossing powder to create the bottom edge interest here.

I thought I would stamp out my little tag/bookmark at this point and inked the edges simply in weathered wood Distress ink to match the card , punched a little hole in the top and added some skinny ribbon to match and a little pearl heart.

 I opened the card and covered both inside parts in Aqua card to match and cut little pockets for each side to hold a little voucher card or something, I punched a little half circle in each for ease of removing the gifts etc and of course a little ribbon and bow. Inside you can see I created a pocket for the tag and covered it in Hessian fabric, a hessian ribbon bow with a skinny bow on top I also added a wooden button with a pearl heart which would show through once the card closes. I also added letters made from Hessian spelling heart to match the tag.,

 Here is the first side , with more hessian letters saying " live", again like Helen's lovely verse I used on the tag. You can see the splats a little clearer here too, blue on blue and tea dye on tea dye, I added a strip of the ribbon so it can be closed and a bow tied to keep it shut. I also added some flowers in half a spray here which would close together with the other side and more flowers to complete the Rose spray.

Here is the other side with more letters this time "love" from the verse too. the other half of the rose spray is now seen here and some little pearl hearts plus the stamping can be clearly seen here too.

 Sorry about my gear in the background (pretend it isn't there ) haha. Here is the card standing open with its little pockets and tag on show too.


And here it is standing closed with the Rose spray meeting and the bronze embossing on the Grunge flourish at the bottom of the card showing and the tag poking from the main pocket too.
Here's that embossing and splats behind with the polka dots behind that , even embossing can be layered with these deeply etched stamps.

 A couple more of the sides and pockets here.

I held it up against my cream wall here to let you see the colours better here and you can see the shine on the embossing too.
Here are the stamps I used from Visible Image this week.

                                   Grunge Flourish                                     Live love,laugh

                               Polka dot background                                     Ink splats.

I hope you liked this little one for today and I will go back and answer all your comments today so please go read your replies of course, sorry I am late with them this week.
Here is a link to the Visible Image blog and a post on my Utee card with The Newly launched Revolution set if you would like to see the instructions again and this week I will do a full tutorial on the technique part , if you get a minute pop over and have a look at the wonderful work by the team there too.

Ok friends have a wonderful Sunday and I look forward to reading and answering your lovely comments as always.

Love and hugs 

Kim 
XXXX


Sunday, 24 November 2013

Visible Image Sunday

Hi Everyone.
Welcome to all the new ladies that joined this week from the Blog hop we have been running for Creative Expressions this week, the winners will be announced on their news blog on Monday and I of course will post the winners here too once they have all been announced. On that note I am up to 89 followers now and as promised I will be running a competition once I get my first 100 followers too and I have some lovely Candi stashed away for this occasion so tell your friends and get joining we are nearly there.
Anywho,
Wow doesn't the week fly by so quickly. Here we are again and time for my post for Visible |Image. I just love creating backgrounds and getting all inky and today was no exception and I love how it came out with lots of layers.

I have used a couple of different Sets on this piece and lots of Distress inks.
     
  • Firstly I took the Barbed wire stamp from the Immortal Love set and stamped it several times with Archival ink, I used Versafine but you could use any that you have. Give it a blast with the heat gun and set it well. I ran an anti static pad over it too to make sure.
  • Next I used The Bronte border stamp with London Fog memento inks and stamped it all over the page too. Again dry well.
  • I then took the crackled stamp from the Time set and stamped and embossed in clear on 2 diagonal corners. 
  • At this stage I chose my colours Tumbled glass,faded jeans and aged Mahogany Distress Inks and blended them all over the card.Dry with your heat gun in between every layer.
  • I then added some ink splats in chipped sapphire Ink in the odd place and some bronte border in chipped sapphire too. 
  • Next I embossed some white ink splats randomly.Mat this piece onto some white card then black and another white and set aside.
  • Stamp the sentiment , I used the gorgeous Create with your Soul and cut out with the spellbinders label of your choice or any die, I used labels 4 and inked through the die with a little faded jeans.
  • I then cut out 6 very small leaf sprigs and attached 2 of them to a larger leaf in tonal colours and added a small red rose bud to each, I added these under the label and added more to the opposite diagonal corner and added  a smaller tonal blue rose bud to each side. 
Here is a close up of the sentiment.


 Its quite difficult to make out the writing from the Bronte border as I did it in a medium colour but in real life you can see it easily and it is very pretty.

The finished card is 5 x 6 and 1/2 inches.

Here are the sets I used 

                                   Ink Splats.                                           Bronte Border

                                  Immortal Love                                           Time

Create with your Soul.

 
I hope you enjoyed this tutorial and that you give it a go , Please leave your comments below as always  I read every one and appreciate them so much. Have a wonderful Sunday and I will be back soon.
Hugs

Kim 
xxxx


Sunday, 15 September 2013

Visible Image and Free your Imagination Sunday.

Well Hello to all on my little bloggly site.

Firstly I have to say to all who have had internet issues arrrgggggggggh, how annoying is it that you can't blog and who said it is easy to blog from your phone because Noooooooooooo it isn't haha, well it isn't if your me that is but Despite a shaky two calls to India Virgin redeemed them self by sending a very very nice man who gave me a shiny new contraption, housing not just a new modem but a new router and all is well in blogland again.. he even made sure me and number two child's phones connected to the net too so here I am to thrust upon you some new artliness ( is that a word.. hmmm well it is to me and I speak Kimglish).

I missed last weeks Sunday post for Visible Image so here is this weeks to make up for it I hope.


I used lots of their gorgeous stamps for this piece and I really enjoyed getting my inks out and getting mucky again.
  • I started with the Background and used the Crackled Background and my Frayed burlap Sir Tim of Holtz ink.and stamped all over an A5 piece of white card.
  • Then I took  more inks and blended them into the background , I used tumbled glass and dried marigold to start ,Then on the outer edged I used faded jeans and Rusty Hinge on the colours respectively.
  • I then took the Bronte border and stamped randomly in Versamark brown ink. and dried with my heat gun to set it all. I ran an anti-static pad over the whole thing then several times to dry it thoroughly.
  • Next I took the same stamp and used my versamark all over it but keeping a random pattern stamped over the background again, this time I sprinkled a True white embossing powder all over it and heat set again.
  • I then took the Grunge flourish and Walnut stain and stamped it just in 2 of the corners and blended the ink a little on the orange shades on the outer edges.
  • I used the Ink splats and Chipped Sapphire ink and stamped randomly just 3 times was enough and also used it on the edges of the blue shades on the background. A lot of work goes into the backgrounds but it is so worth spending the time on them as it looks amazing when put together.
  • Ok so now I mounted it first onto a piece of black card and then onto a piece of white leather effect card and set aside. I stamped the free your Imagination Phrase from the stamp set of the same name on black card and embossed it, along with 2 of the large feathers in gold embossing and 4 of the small feathers in true white embossing powder. I also stamped the inky bird from the same set onto white card which I cut and mounted on black and  then white card.
  • I cut out all the feathers leaving a tiny border of the black card showing, just enough to make it stand alone from the background.
  • Then I took a large piece of black card and mounted the background to it. I added the two gold feathers to the top and the four white at the bottom in the middle I raised up the bird on foam to stand out from the back ground and I did the same with the phrase at the bottom.
           voila my  piece of art with these fabulous stamps is created. I have so many pictures so I will add then below along with the stamp pictures too. Let me know what you think as you all know how much I love your feedback.
 Free your Imagination in gold embossing power on black.
 White Embossing powder on black, remember the tiny black border,see how it pulls it out form the background.
 Nice close up of the background texture and the gold feather here.
 A slightly closer look at the finished project.
                                Ink Splats.                                                    Bronte border.

                                     Crackled Background.                     Free your Imagination set.

                                                                 Grundge flourish.


Well I used a lot of stamps this time to build the layers needed for a truly textured background and your eye travels straight to the bird and then to all around the scene and can do so comfortably without getting a sense of emptiness in any part of the frame.
Technical hey lol
Who cares as long as you love it as much as I do and as much as I loved making it. I hope you have a lovely restful Sunday and I look forward to seeing your comments.

Lots of crafty hugs , I missed you guys this week in internetless baron lands.

Hugs 

Kim 
xxxx