Sunday, 10 February 2013

Valentine's Day Style.

Hello everyone,

It is Saturday evening (late) lol as usual and I have just finished doing my blogpost for Craftwork Cards.   They have been having a really busy week as they are opening a retail outlet at their factory in Leeds. I so wish I lived nearer so I could run workshops etc., but I hope to do some in the summer at least, so if you live in that area and would like to go along, they are so lovely and are having a opening night and weekend this week. 

In honour of Valentine's day this week, I thought some of you might be in the mood for some lurvvvvving... haha so I created a box in my style using some Craftwork products of course, so here goes...
This is the view from above and you can see how I matted and Layered some pretty paper etc. before cutting out some shapes and adding them to each end. I then began making the large flower to the top left.


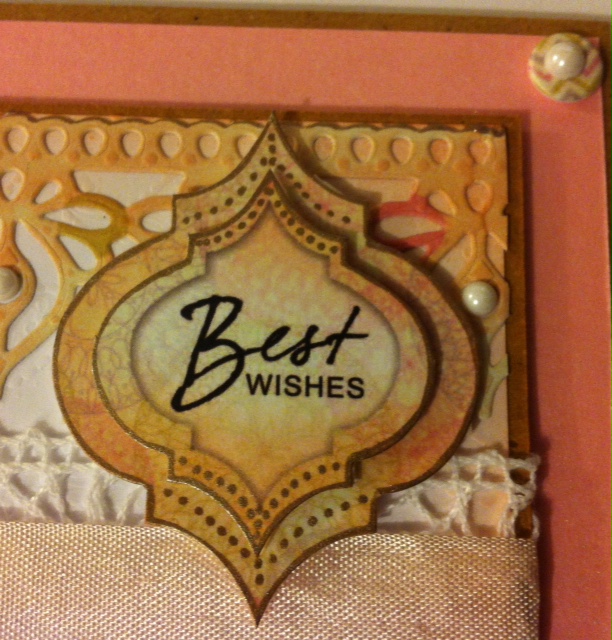
These are the sides of the box with letters inked and mounted onto black card, cut out and added on top of a piece of crochet ribbon, and then seem binding in a subtle pink shade.

This is one end of the box with the little jewel hanging from a jump ring pierced into the flower I made.
And here is the same seem binding tied into a messy bow with a small heart and key added.
This of course is the last end with a little heart key attached to the crochet and it swings as the box is moved. Of course, anything can be added to the box, chocolates or bubble bath fizzers of notelets, pot pourri, anything really, just to show you care so much, but of course everyday is for that not just Valentine's day!

On this theme I want to say that I appreciate everyone stopping by and really do enjoy reading your comments and having interaction with you all. So, it seemed a good time to leave my links to my facebook, twitter etc. so you can chat to me anytime should you want to say hi or even ask how to create anything you have seen. So links will all be below at the end of this post.

I have just heard form the lovely Linda at Memory Maze Design that our boxes of goodies are all ready to be shipped! So, of course I will be showing you all what I can create with their chip board shapes too; I don't think I have ever seen such detailed chip board anywhere! And we can also design our own pieces and Sally the owner will cut them digitally, so that means you will be seeing some really intricate and fab detailed work coming through, so keep popping back and of course I will let you know the dates to go peep at the site too but, as I say, below are all the Addy's. 

Have a great weekend and I hope to post again tomorrow.

Crafty Hugs

Kim 
xxx

Facebook
Twitter
Craftwork cards
Memory maze
kim.robertson70@googlemail.com


Sunday, 3 February 2013

Autumn or summer? you choose...

Good evening, everyone!

Well, it is Sunday evening at 9pm and I have had a lovely weekend, just the right mix of relaxing but not too much. I have done some shopping and got a nice bargain or two for my daughter to take on holiday soon.

I managed to get some boots with a huuuuuge discount for me too, so I am a happy bunny. I have caught up with friends and a few chores and then in the middle of all that a little of my favourite thing... a lovely card for you all to see. How about you, did you have a good weekend? Are you still enjoying it or are you relaxing in bed after preparing for the next round of rat racing back to work?
If you crafted what did you make? I'm feeling a little inquisitive I think, haha... Well without further ado... Here is my little bit of the opulent I think:

So pretty and girly too...
My backing card was a blank from Craftwork of course as they are so very sturdy and definitely would never buckle like Bambi legs while standing proudly displaying itself oh nooooooo there surely isn't much worse than trying to stand a card and it just sliding down like a drunken sailor down a wall. hmmm random... 
  • I took some milk card and die cut the matching Grand label 1 spellbinder.
  • Repeated with my Beautiful Creamy Craftwork paper with swirls foiled in gold... (very strokeable) in the next nesting spellbinder. Matted and layered then down with my Collall multi use glue. Seems to give strength and stability to the card front.
  • I then took a co-ordinating paper in a more latte tone and tore around three edges and inked them with Lord Tims (ahhhhhhhhh) Distress. I also took a water brush and made the raw pieces slightly wet so I could roll it easily around the edge of a brush but you could use anything tweezers a ball tool absolutely anything you are familiar with using. I adhered this to the right opening side of the card, which I forgot to say is 8x8.
  • I took a thin strip of gold mirri which has a leaf pattern embossed into it and ran it down the middle edge of this paper. Not sure why other than I liked it and it called to me.
  • Then die cut a D-lite pattern and added it on the left in latte card, also a circle from the same mirri and a CWC sentiment which was mounted on foam to raise it a little. 
  • I took some ribbon form Crafter's companion with a ruffled crinkly edge in a champagne colourway which looks so pretty, I made a bow added stick pins and a decorative clay element to the middle, those of you who know me know I just cannot leave a bow naked, I do like to add something and on top of that I added a Candi. I set that aside to dry out while I made a start on cutting my flowers for the bottom.
  • I took the same shades of papers and cut some spirals with my Grand Caliber and then sat making them up and curling them, gluing them and getting them to look how full I wanted them. I also cut some random circles out of my ribbon, some medium some small, and stood them on my craft mat, holding them with a metal pokey tool I added heat until the ribbon buckled and melted  a little making it look sooo pretty and then added a sparkly brad in the centre to hold them together. Now, I must thank the amazingly talented and super nice Sue Wilson for this I saw her demo it on Create and Craft and dived right in to try it, it's fab so Thanks Sue. Lastly, for this section I took my Mirri and cut out the leaf pattern by hand just randomly and cut two leaves for either side and mounted it on foam just in the middle for a little shaping, I also added a Candi on each.
My dressed bow .

My Flower section.

Sentiment on Mirri and D-lite in Latte.
  • So, after this I glued my bow in place and my flowers too, I finished off with a few Candi but also some pearl swirls cut from one large group of swirls, which was enough to do three different areas of swirls peeping out from the bow etc.
  • My last piece of work was to stamp my beautiful personilised Clarity stamp on the back simply saying Designed by Kim. And to decorate the inside as all cards need that to complete them and make them look finished and professional. Below is the inside finished simply and elegantly with Craftwork card's gorgeous papers.

So lastly, I wanted to share some news with everyone, as you all know I am now designing proudly for Craftwork Cards in the UK and having a great time as the team have to be the nicest people I have ever met in craft so far and yesterday I did my first blog post for there blog which was great and very well recieved, it was the same as I posted yesterday on here but if you fancy a look over on their blog all are welcome.

http://craftworkcards.blogspot.co.uk/

Now, I was lucky enough to be chosen to also design for another company called Memory maze this week and I am so super excited. They are based in Australia, and the co-coordinator is Linda Thompson who is very talented with scrapbooking and they make the chipboard shapes used in scrapping and card making, altered art etc. and I can't wait to get started, we are planning for a March start by the time I get my pack so please watch this space, I am sure the eagle-eyed of you will have seen another badge go up on the blog anyway, haha...

Their blog is definitely worth peeping at too and is http://memorymazedesign.blogspot.co.uk/ and there is a feature on me on the first page at the moment, yay!

I think this must be my longest post haha! Sorries if you got bored or yayyyy if you like long posts. Have a super fab Monday and hopefully I will be back Tuesday for more postiness.

Thanks to everyone who left me comments on my Craftwork blog and my facebook /twitter sites. I appreciate every word and will always answer you. Kind words take a moment but mean so very much.

Crafty hugs

Kim xxxx

Saturday, 2 February 2013

Sweet Pea Goodness.


http://craftworkcards.blogspot.co.uk/

Hello Everyone.

You may have seen my Christmas cards here on the blog but It's now time for me to take up my role as Design Team new girl for Craftwork cards and share some little cards I made using the Sweet Pea paper packs which are simply stunning and can be purchased over on  http://www.craftworkcards.co.uk/default.aspx 
I absolutely fell in love with the blue tone pad but this one is stunning too. 
If you look in the background you can see some gorgeous paisley embossed cardstock which also happens to be CWC. It came with my Recipe cards, of course you will see some cheeky little Candi in here too.

Some close up pictures to show off the layers of Paisley, Candi and Sweet Pea papers.
Why not have a look at the gorgeous Sweet delights goody bag here http://www.craftworkcards.co.uk/products/2784/sweet-delights-goodybag.html
They truly are sweet and yummy without the sins haha..
Here's my sentiment also from the pad ,I added some gold pen in dots, I thought it would look really pretty as if it wasn't pretty enough.
Lastly of course the inside just has to match and here I think you can see the paisley really well.
Now my little Vintage Sweet pea card.  The DT girls had a sneaky peaky on facebook this week. I love this card ,it just flowed so it was clearly meant to be. Do you love it too?
I would welcome your comments below and of course there are lots of gorgeous bargains in the sale section on the website so go have a look and snaggle  (hmm not sure that is a word but you no, I like it so I'm having it.. snaggle snaggle snaggle .. yup just rolls off haha)
http://www.craftworkcards.co.uk/products/by-category/2/105/clearance.html

I had this card on my blog this week and couldn't wait to share it with you all. The colours in the papers are simply stunning and go so well with all the Distress  Ink shades too and as soon as I opened the pad those colours jumped out ready to have Cut and Dry slathered all over the ink and tickling the corners of Miss vintage here to give it a little extra depth.
Here is a little close up of the sentiment from the pad.


And my little butterfly and flower alighting on the seam binding bow.
Lastly of course as always the inside to finish.
Well I hope you enjoyed this my first time out with the lovely team and I want to thank them and Julie and everyone at CWC for having me and also all the lovely visitors to the blog, I hope you managed to get yourself some bargains I know I will be and I look forward to seeing you all for another post on Sunday 10th Feb and as this wasn't my Official day Big hugs to Emma for letting me stand in for her. Thanks also so much to Karen Hayselden who helped me get started today even though she says I sound south haha, Thats so funny. Bless you Karen.  Mwaaa

Crafty Hugs to all

Kim
xxx


Tuesday, 29 January 2013

Sweetpea Thank you.

Hi there lovely bloglanders!

Ahhh, here comes my usual sorry for neglecting you... I have been working working working, and then falling asleep. Though Saturday was a fun day, as it was my birthday. That's right, little ole me hit my 43rd year and felt every one of them last week haha! I had a fabulous night out with a new buddy who was great fun to be out with, I don't drink before you say what was on the tip of your tongues! So I happily drove my friend and myself to a pub playing Motown, yay! Luther and all the best were there lol...

Anyway my plan of action is to get this show on the road and get my blog posts up and running and catch up on all my lovely crafts, especially as I am now on the Craftwork Cards design team.
Talking of the fabulous Craftwork cards they will be at  The Great Yorkshire Showground, Harrogate, HG2 8NZ on 
Saturday 16th and Sunday 17thMarch

 http://www.craftworkcards.co.uk/event_details.html?eventid=925646

This is the link to go get your tickets if you fancy some lovely crafty hours to while away having fun. Craftwork are very proud to organise this event and there will be 50 retailers and they will be doing some fab demos etc, and you can shop til you drop.

I have made a very pretty card with Craftworks Sweet pea pad in the blue colourway and I hope you love it as much as I enjoyed making it, Its feminine and pretty and has lace and bling what more could a girl want haha... 
Here it is...
It looks really simple, but it took a while tonight as I wanted lots of detail. For instance, the little dots around the flowers and in the sentiments which were added from an old gold sakura pen. 
 
I cut out some of the petals in this flower which was from Craftwork Cards Sweetpea pad in the blue and beige/chocolate colourway and was solid all way round. I curled the petals, added a die cut flower, and then the next layer from the pad lastly added a sparkler to the centre and before it letting dry well. 
Here you can see how I cut the solid flower in half and used half on the bottom of card the other half is on the top. Then I added the next size, also cut in 2, and raised on foam pads to lift it and a finishing touch was a die cut tiny butterfly with his little sparkly body.
Lastly is the matching inside, I do love a card to match all the way through, much more subtle but all the same tone and details.
So, as the card says, thanks for popping by and reading the mutterings of a 43 and a bit year old, who happens to love all things artsy and craftsy...

Take care all and hope everyone is having a good January which is unbelievably nearly February already.
Love to all

Kim xxx


Saturday, 29 December 2012

Happy New Year/exciting news...

Dear bloggers,

I haven't got a new piccy for you today, just Happy new year wishes and hope you had a fabulous Christmas. Feel free to leave me a comment and let me know how your time over the holidays was spent and what you got up to.

I had my wonderful son home for the last week and I am having to let him go back to Uni tomorrow so I definitely feel a slow sadness creeping on as I have enjoyed every second of my time with him this last week. What a special young man he has grown in to. My daughter lives with me still after finishing Uni and has been here all of Christmas but is going off into London for new year so I will miss her too... Time grows and they grow up too fast for sure.

I do have a little very exciting news for you all though... Last week I sent off all my Christmas creations that I had been asked to do for the Fabulous Craftwork Cards. Most of you will know I have made a few bits for them over the last few months after meeting the lovely Julie at a show in the summer. Well, I pulled out all the stops with my birdhouse card and they loved it so much that they asked me if I would like to be on the design team officially! Well, I cannot tell you how very happy I am, and that night I was inundated with emails from all the girls on the team already welcoming me and I am still so incredibly humbled by how wonderfully welcoming they have all been! I am amazed and so very touched at the warmth I have been shown. Thank you, ladies! I can't wait to work with you all. Since then I have been officially been added to their facebook design team site as a designer and also to the official Craftwork cards blog:

http://craftworkcards.blogspot.co.uk/2012/12/welcome-to-team.html

Please go and take a look at how wonderful this team have been in welcoming me and have a look around their site, and if you fancy purchasing any bargains www.craftworkcards.co.uk
you're in for a real treat if you pop on and have a look too.

Well, I want to thank you all for being so nice in leaving your comments since I started this blog and some very exciting times are coming so please keep coming on and supporting me! You're all so lovely. I will be adding some creations over the next couple of days so check back with me soon.
Happy new year to everyone 2013 is almost here , big hugs to you all.

Kimmy
xxx

Monday, 10 December 2012

Oh Christmas Branch haha...

Good evening lovelies.
I made a nice little card with some Kraft cards sent to me with my Craftwork card goodies, so I made up another Christmas card for them! Of course I have to share it with you all to see if you like it and that I'm still on the right tracks.

I do love receiving your comments, as it's good to have another crafter's opinion too, I think! And also it keeps you grounded.

I just heard the sad news that Patrick Moore passed away earlier and it is very sad; he was a funny, eccentric guy but my late husband was a huge fan of his work so it's very sad. His family must be devastated at the loss so I want to pass on our condolences to his family. If you don't know who Patrick Moore was (have you been hiding forever?), he was a very clever scientist who had a very dry sense of humour and some, as I said, very eccentric ways, playing a xylophone on stage in said crazy manner was one of them, haha! But he was also a very nice man who found time to always help others too. R.I.P Patrick. My husband passed on the 14 Dec last year so maybe they are finally meeting up and having a chat now. Sad week ahead.

Now back to my little card...

  • So i started with my Kraft card and cut out some red card for the base and the back pieces, sticking them on and setting them aside.
  • Then cut an embossed swiss dot type card and rounded corners, and also inked edges to show up the dots and contrast with the red.
  • I matted that on foam pads and onto a piece of checked paper from Craftwork cards Christmas pad, adding a small strip of American seem binding across the bottom before adding pads.
  • Inside the embossed pad was some dye cuts of trees and birds etc so I took a tree x 2 and a circle to use as the moon and a long branch. I inked all pieces and added sparkle where needed and also punched out some circles from the sparkly gorgeous paper pad too for the baubles hanging from the tree.
  • As this is going to be an Easel card I stuck my art panel to the base at this stage and attached my stopper which was a strip of card and a Happy New Year sign in gold and also and & sign as I new I wanted to have With Love at Christmas on the top piece.
  • So I attached a piece of gold trellis to my dotty panel and then inked my moon with distress ink in chipped sapphire, a rich deep blue and covered it in a shimmery Sakura pan and water brushed it out to give a moonlight sparkle.
  • Working on the tree next, I coloured 2 trees in gathered twigs and a coppery sakura pen, again water brushed out a little. The bottom layer I didn't fuss too much with but the top one I tried to have one side darker away from the moon etc. I stuck down the first piece then for dimension matted the next on foam and rounded it a little. The twig I mounted onto foam after colouring and added to the top of tree and in front of moon.
  • I used a small piece of green ribbon in strips from the branch. and added a tiny tied piece to the top of 2 baubles I made from punch 1" circles out and mounting them onto a slightly larger piece of red card. I also pierced a small whole in each and added a jump ring and a tiny Chrystal that I added to a headpin and snipped off the excess. Some of the pics don't have the crystals and some do.
  • I added them to the card and nice bow to the base of the tree with an iridescent sparkle in middle then I needed to dress the tree so I inked up some leaves and curled them added them randomly to cover the gaps in twigs and also I used some card candi in the Christmas designs to add to my tree.
  • A Couple more stones and sentiment features and the last thing needed was a few flowers to the base and a leaf. 
  • Et voila.... done. 
I hope your enjoyed looking at this one I sometimes wonder where these ideas pop in from! But I love the finished result, so I hope you do too.

Oh Monday again and back to work and dragging my heels. I really am not enjoying these cold, dark mornings and would love to ship off somewhere new to start a new career... Ahhh... the dreams, haha!
Have a great week guys!

Let me know your thoughts on jewellery items added to cards for movement... What do you think?

Out for now...
Kim xxx

Tuesday, 4 December 2012

Another Santa note..

Well good evening my lovelies!

Well hasn't it turned cold woooo every night from work I rush in and shiver 'til I get my steaming tea to wrap my hands around! Winter is definitely breathing down our necks now... with the icy fronds encountering our extremities turning them red first then blue... Making patterns in the air with our breath on the icy morn. Ooo I should write a story with literature in that vane.

I started this  card really by making up all the little flowers from Craftwork's Christmas pad. so I had them all sitting there jostling in the box for my attention, pick me! pick me! haha...
Next I took an 8x8 card base (still my favourite size) and with Versamark ink, I stamped holly leaves around the edge, I used Pan pastels to rub over and add the green to the inked sticky surface. I water coloured some red berries in in odd places to just draw your eye in.

  • I matted the first mat with a sheet of red glitter paper from Craftwork Cards Christmas pad on to gold mirri.
  • Next, I took a sheet of the embossed card in one of their pads and ran over 2 colours of Ink from His lordship sir Tim holtiness.. fired brick and pine needles. Just lightly to bring out the embossing a little, which was then matted onto mirri too.
  • My bow was American seem binding which is so soft and lovely and flexible to work with. Adding a button to the centre of the bow and 2 stick pins made sure Mr Bow was not naked...
  • I die cut the labels 20 large sheet of paper and ever so slightly inked and added it to the card, I coloured my sentiment from the pack, cut out a little die cut to add to the frame around the sentiment and then piled on all the gorgeous flowers and flourishes, some card candi too.
  • Added my gorgeous Clarity personalised stamp with my name on to the back, et voila... tis done..


As always I hope You enjoy looking at the card and maybe trying a few things out too
Crafty Hugs.
Out for now
Kim xxx


Monday, 3 December 2012

Birdhouses and Santa.

Hi All.
So sorry haven't been blogging so much, I have had so many orders to get done that I have gotten a little slow with it, but I really miss coming on a seeing your comments so here I am, I am still making a few items to give to Craftwork card for Christmas and tonight I thought Id use one of their lovely bird house blanks to make up so here it is then I got a flash of inspiration an thought Id turn it into a box haha, so here it is... hope you like it, let me know.

So for this card/box I took my birdbox card and snipped it in half to start and covered both halves in corresponding papers from of course the brilliant Craftwork cards, the lovely Julie Hickey had sent me a big bag of bits to make some Christmas goodies and so I have been making them up but have also had some commissions for artwork to get done, I have been working on a line drawing in pencil of an MG motor vehicle for a guy I work with.And yet another lady is pregnant so another crochet blanket is in the offering.
Anyway back to the card...
  • After covering each half , I took some very sturdy black card and used my Crafters companian ultimate pro to make a box up that is smaller than the card but still large enough for either a bag of goodies or to put in a false bottom and have some birdies pop up as you open it like a suprise box, something like that, may have even a little faux nest but then I would associate that with Easter more than Christmas .
  • I seem to be waffling tonight maybe it is because its 12.38 and I should I suppose be attempting sleep as Its work tomorrow, really wish My job was in the craft industry, I'm working hard on that but it is very hard to get into. I would love to bring out my own stamp range so who knows maybe one day I will get that chance.
  • I also covered the black box I made just on the outside with again the matching papers, amazing quality they are too.
  • I then attached the front and back to the box and made sure all the adhesives were covered.I added some American seem binding as ribbon around the outside of box and also all over what would be the eves of the house near the roof. Making also a sort of bow on the top inside the roof area by making up 3 loops in varying sizes gluing them in place and adding a small piece of binding around it to look like a triple bow.Finishing it with some candi here and also along the eves again inside and out.
  • Next i die cut the circle from Spellbinders splendid circles for around the window, I was going to cut it out and leave acetate in the aperture but last min I thought I'd use it for the sentiment but I may make another and do that so you can look into the box.
  • I cut out lots of leaves with my Grand calibur too and and the pack of flowers that came with the birdhouses I rolled them and embossed them a little to make them rounder , then rolled them or curled them up, one I made up into like a rose by gradually sticking down each set of petals one at a time. It doesn't show on the picture as I took these photos just before I decided to make 3 tiny flowers with the Donna Salazar bitty blossoms dies from spellbinders (amazing).
  • I made sure my box opened and closed and added some finger holes to make it easy. Glued all my flowers with Pinflair and there we have it, I am still in 2 minds regarding the sweetie or little birdy things popping out but anyway the main thing is done.
I hope that you get chance to come on and have alook If so leave me a comment I don't bite.
Have a great Monday and   hopefully I will get chance to pop on and added the other card I made today.
Love to all
K xx

Monday, 19 November 2012

A Note From Santa.

Good evening all...

Hope everyone had a good weekend and Monday was bearable... I really am not a Monday person , the day I like is Thursday , Thursday is an underrated day I think... it is a nearly there day that is unless it is your Saturday to work, which it just happens to be mine this week errrkkkk... Anywho .
Another Christmas in the Craftwork Inn and A note from Santa was my inspiration...

That and I love this ribbon I found at a local market stall, It has lots of flecks of gold sparkle in the fabric and the ends are wired just enough to mould it into prettiness.

Here is a close up of my lovely sparkly swirls and flowers made with the gorgeous sparkly
Craftwork cards papers , you can just see the embossed back ground , I ran the paper through my m-bossibility folder and ran an ink pad really lightly over it in gold.
then matted my sparkly paper over an added my flowers again made from the flowers in the paper pad.
A spotty Happy Christmas inside with accents in Candi completes my little 6x6 card, part of my project for Craftwork Christmas 2012.
Has everyone started making their cards yet? or are you last minute crafters?
If anyone is on facebook feel free to add me or send me a message or ask anything Crafty, I am always happy to help.
My addy is
www.facebook.com/kim.robertson.3551
Plus I post my cards there too ...
Have a great Monday evening everyone.
Kim xxx


Wednesday, 14 November 2012

Christmas Craftwork Style..

Good evening Bloggers,
Haven't been on for about a week, so I'm sorry to have neglected Blogland! I have had a horrendously busy week but wanted to share a card I mad for Craftwork cards using their gorgeous Christmas stock.
The lovely and amazingly talented Julie asked if I would do a few Christmas cards for them and sent me some lovely stock to design with and this is one of the ones created so far.
What do you think?

  • I started with the musical notes background made by Just Rite stamps which I love right now.
  • I matted it onto the beautiful glittered paper from Craftwork Cards... sparkly goodness which isn't showing in the picture but it has this green glitter all over which lights up soon as the light catches it.
  • I matted that on to black then onto milk card and added some more sparkly paper just at the sides which was matted onto a piece of red card. All of this is then added to another black mat to my Kraft card base.
  • Cutting out one of the card wraps and attaching to the top right came next. A bow to the top left with a dazzler in the centre, no naked bows here... 
  • I  added two wraps of mink colour ribbon top left and bottom right also before cutting out some swirls in the green glitter card and also the chevron sparkle paper. I added the chevron swirls on the left with a made flower in centre and the green ones you can just see under the flowers on the card.
  • I had already made up lots of ther flowers from the Craftwork Card Christmas pad and used several that matched on the bottom left.
  • Next, I stamped "ho ho ho" with the print font also Craftwork onto red paper, then matted onto black, covered in glossy accent so lots of shiny goodness.
  • Lastly, I inked my sentiment and added it. Also, I added lots of card candi and liquid pearl drops, plus a piece of skinny sparkly green ribbon up the spine of card, and added some extra pieces tied off and snipped to look like tinsel.
Well there you go, I hope you all enjoy this card as I really love how it has turned out.
Sorry again for disappearing for a while, more tomorrow from me!
Kim xxx